Removing the background from a product image offers many valuable advantages, such as smoother use across different sales platforms, stronger focus on the product itself, and faster website loading performance. However, many store owners and beginners may feel unsure about how to remove backgrounds on their own.
If you manage your store’s visual design or product image editing tasks, you may be surprised to discover that there are several effective ways to remove image backgrounds. While Adobe Photoshop is a well-known solution, it is not the only choice. Today, there are simpler, more affordable, and highly scalable options available — including professional support from premium photo retouching agency like Cutout Partner.
Now, let’s explore four of the best methods you can use to remove the background from product photos and create clean, professional visuals for your online store.
1. Preview for Mac OS X
Preview is a built-in application on macOS that is commonly used to open images and PDF files. Most Mac users rely on Preview for quick viewing tasks, but many don’t realize that it also includes simple editing features — including basic background removal.
With tools like Instant Alpha, you can quickly select and remove unwanted background areas from product photos. This makes Preview a convenient and beginner-friendly option for making fast edits without installing additional software.
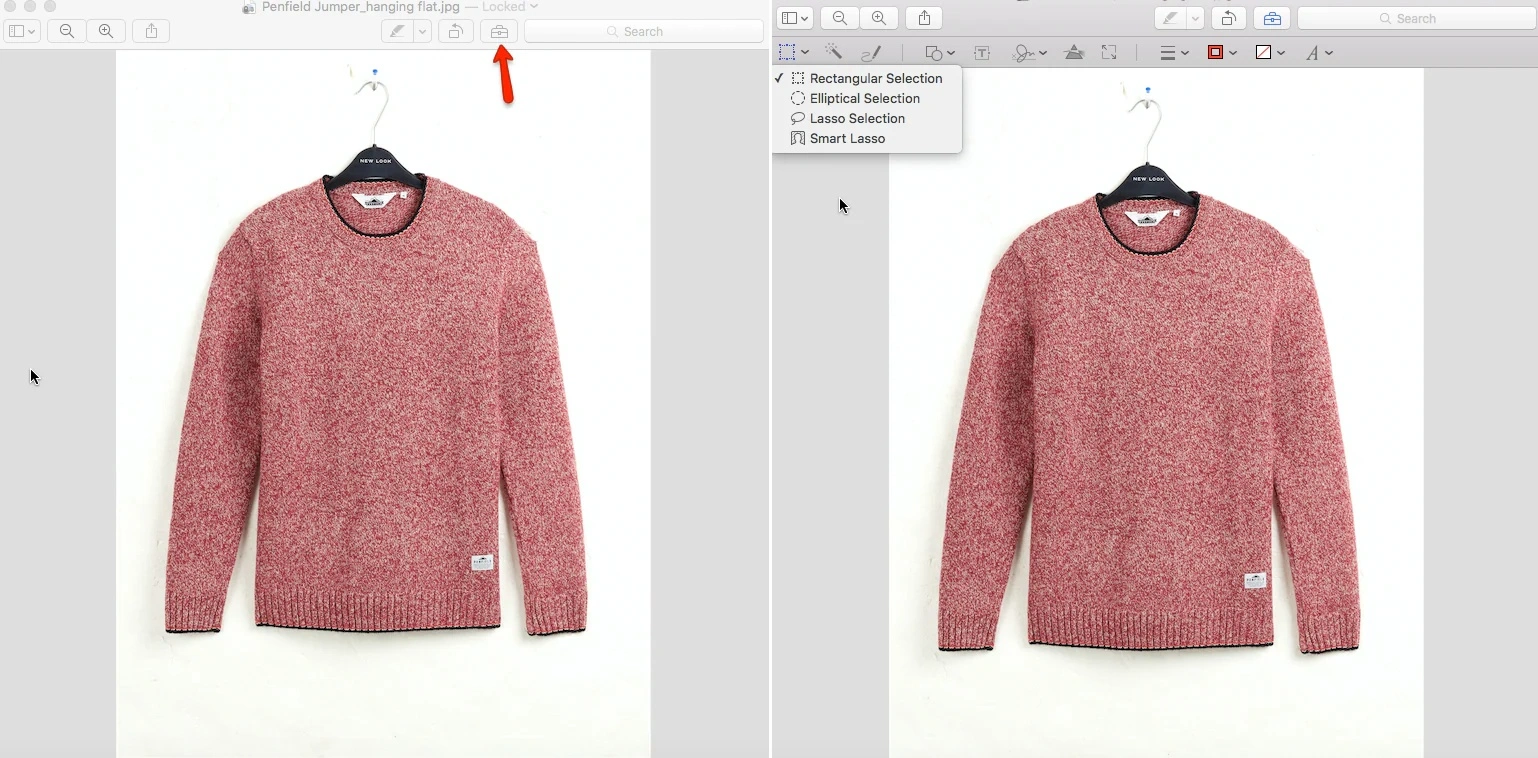
Inside Preview, you can find the background removal tools by opening the Markup Toolbar and clicking the selection icon located at the top left. From the “Select” dropdown menu, you’ll see different options to help isolate your product from its background.
One useful option is the Smart Lasso tool. This feature lets you draw a rough outline around your product quickly without needing perfect precision. Preview then analyzes the area you selected and automatically detects the edge between the product and the background, creating a selection.
To remove the background, go to the Edit menu and choose Invert Selection. This action selects everything except your product. After that, simply press the Delete button, and the background will be removed — leaving you with your product on a transparent background, ready for use in e-commerce listings or marketing designs.
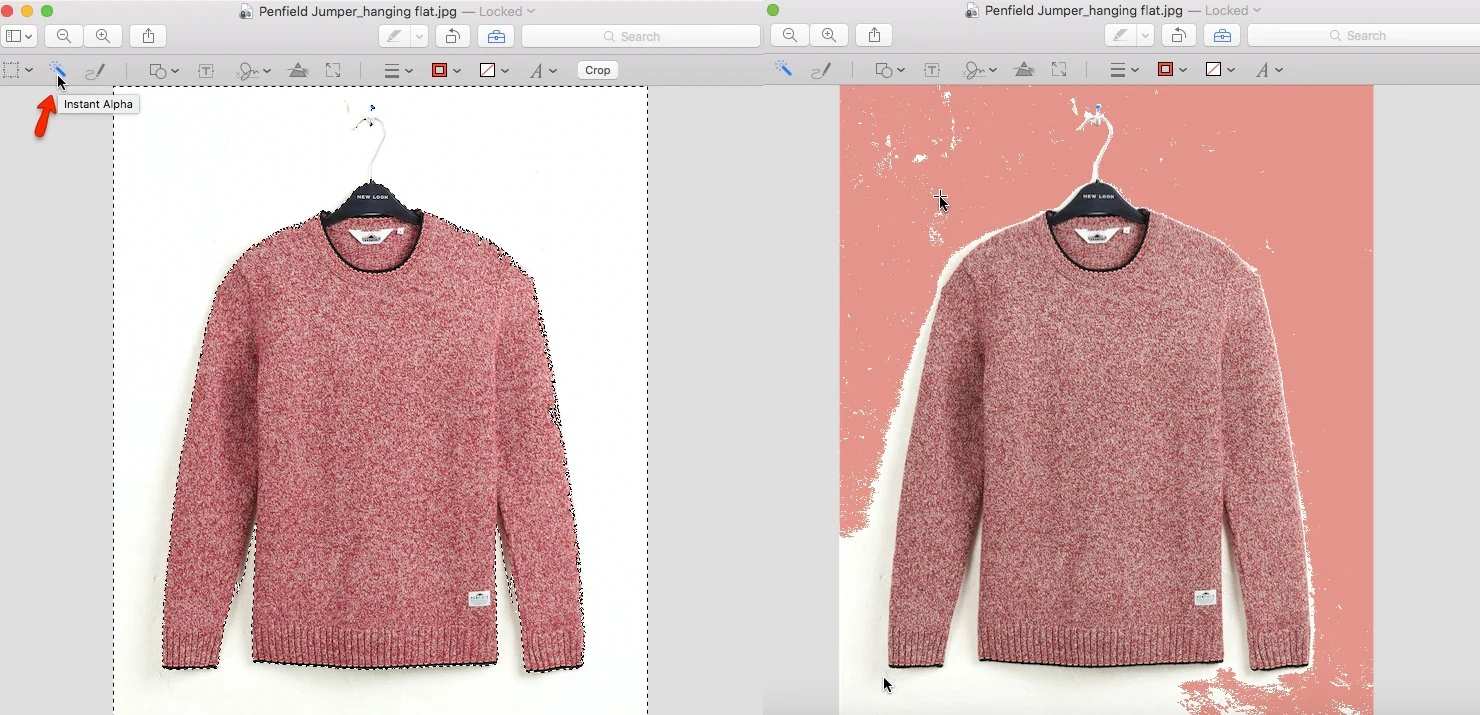
Preview also includes a helpful feature called the Instant Alpha tool. After selecting Instant Alpha from the markup toolbar (the icon that looks like a magic wand), simply click and drag over the background area of your product photo. As you drag, you’ll notice parts of the background changing color to show what is being selected. Once you’ve highlighted the area you want to remove, press the Delete key to erase it.
Instant Alpha works best when the background has similar colors or consistent contrast, allowing the tool to select large areas quickly. However, it may not perform as well on images with busy, detailed, or complex backgrounds.
While Preview does not offer the advanced editing capabilities of Adobe Photoshop, it still provides useful basic features such as background removal, cropping, and resizing. For Mac users, it’s a convenient and completely free option that comes pre-installed, making it a great starting point for simple ecommerce product photo edits for studio manager and product photographers.
2. Paint NET
If you’re a Windows user and don’t have access to Preview, there’s no need to worry. Paint NET is a free application you can download online that offers a wide range of useful editing tools — including simple background removal features for product photos.
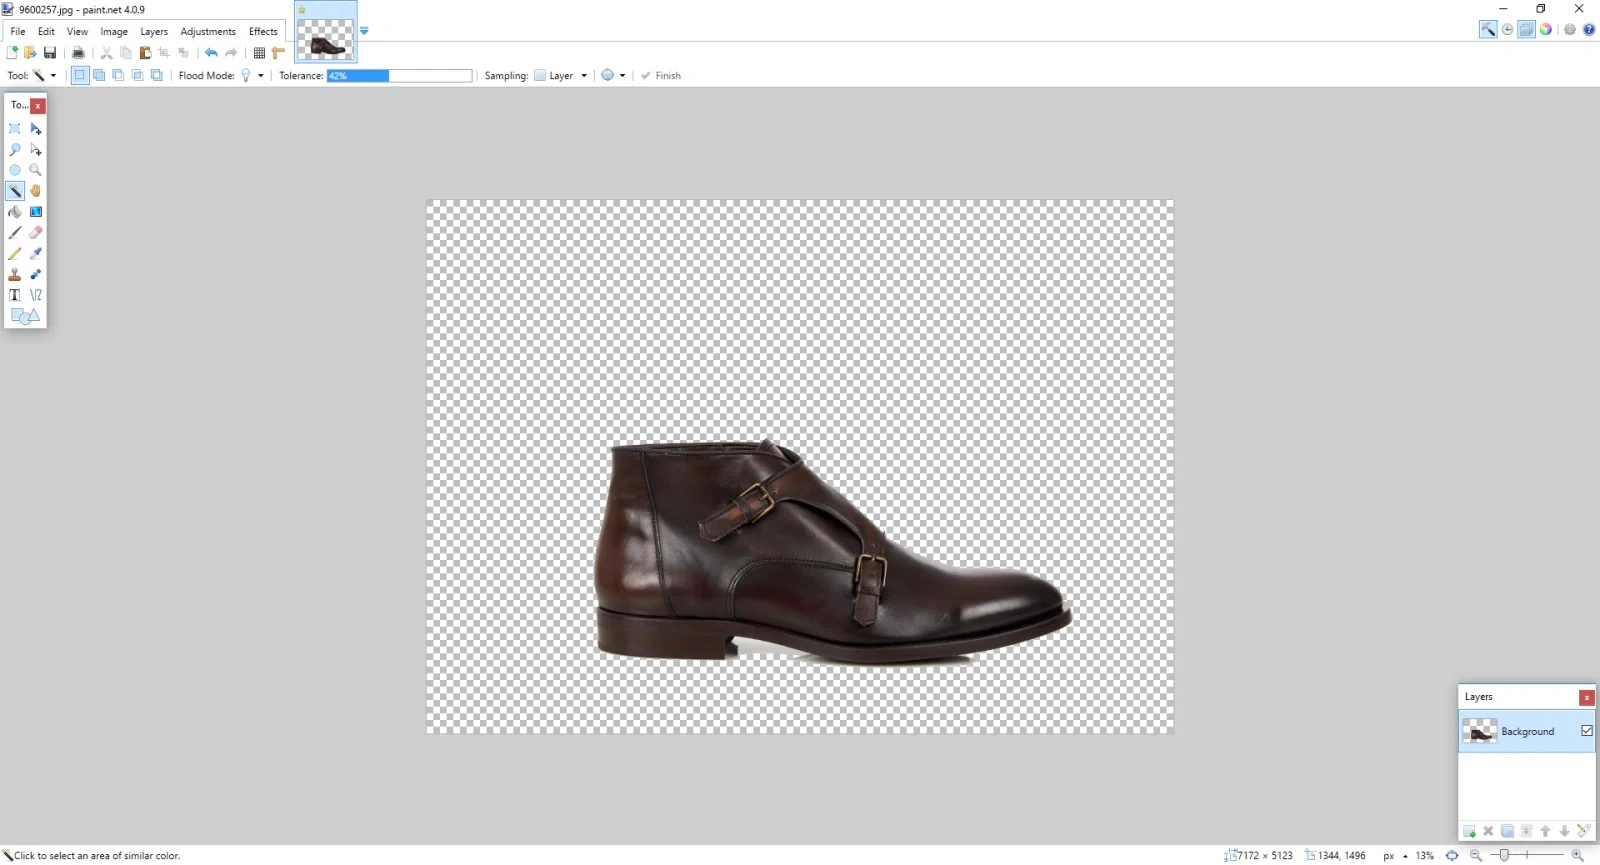
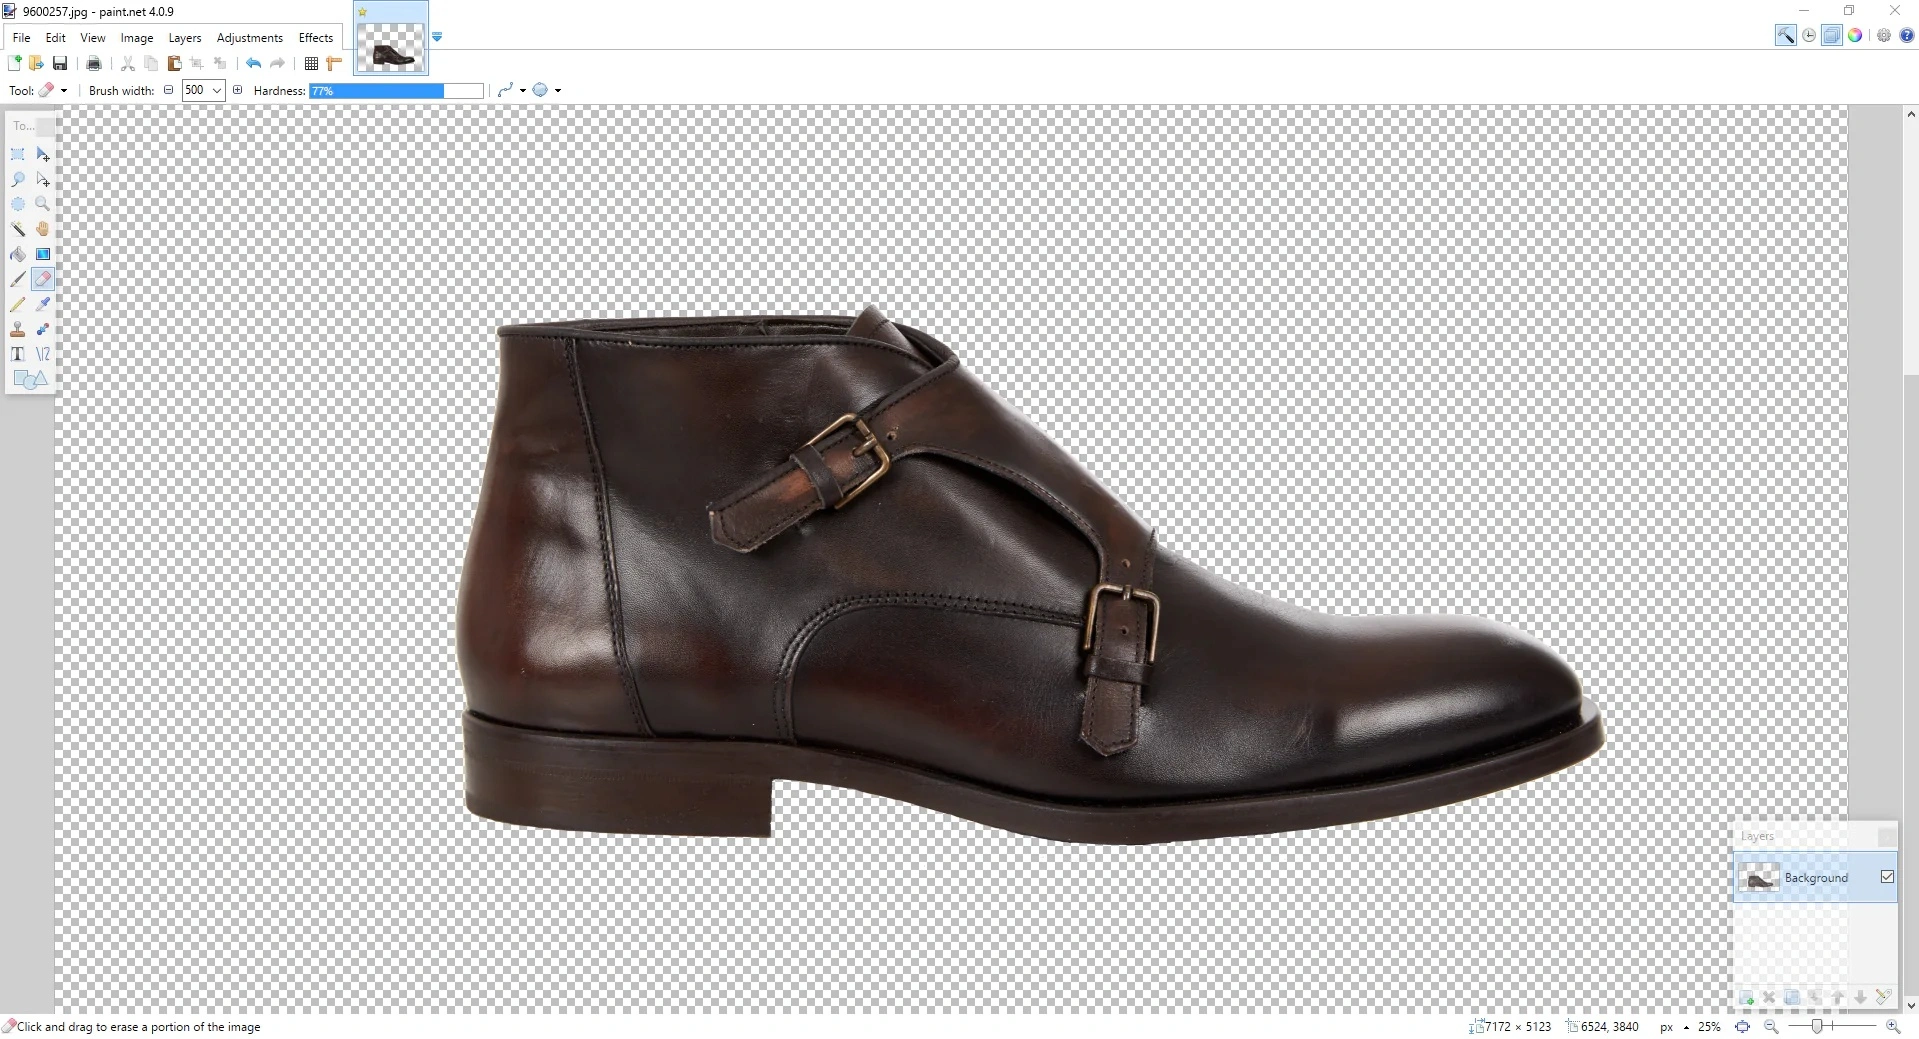
After opening your image in the program, go to the toolbar and choose the Magic Wand tool. This tool works best when your product is placed on a white or solid-colored background, as it can easily detect and select similar color areas.

Click anywhere on the background, and you should see a selection outline — often described as “marching ants” — appearing around the product. This indicates that the background area has been selected and is ready to be removed or refined for a cleaner product image.
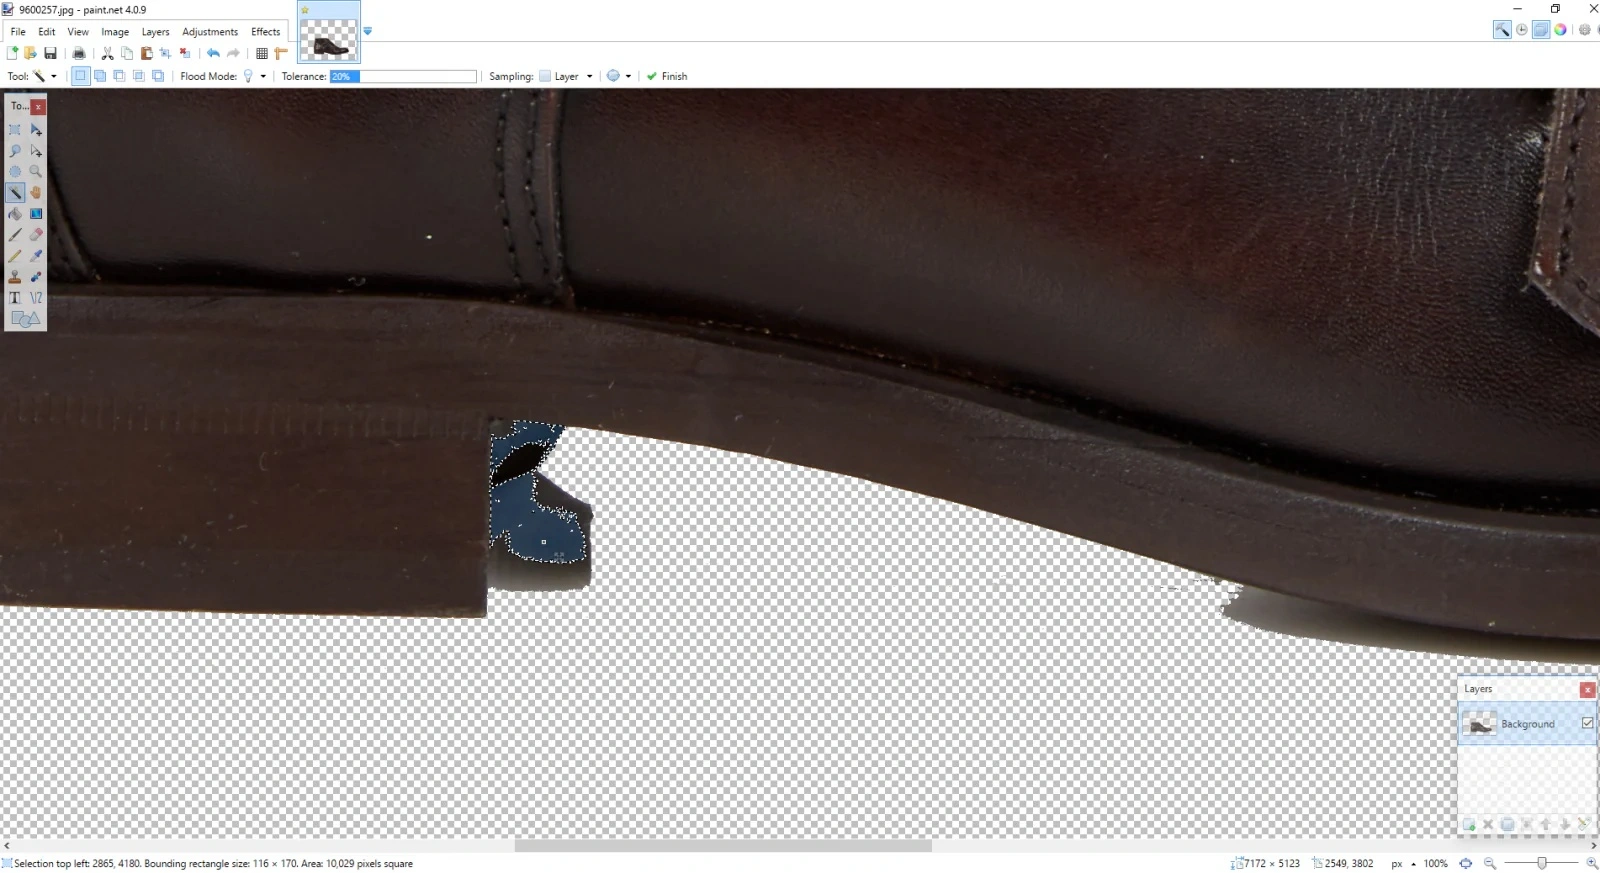
When using the Magic Wand tool in Paint NET, there’s a possibility that part of your product may also get selected along with the background. If this happens, you can simply adjust the Tolerance setting located at the top of the screen. Lowering or increasing the tolerance helps the tool better distinguish between the product and the background.
If your background color is not completely uniform, you may need to repeat the selection and deletion process several times. Gradually adjust the tolerance level as you continue selecting different background areas. With a bit of patience and fine-tuning, you can achieve a clean background removal and create a more professional-looking product image.
After removing most of the background in Paint NET, it’s important to zoom in closely around the edges of your product. Sometimes small traces of the old background remain, creating what editors often call a “halo effect.” This thin outline can make your product image look less clean and professional.
To fix this, carefully remove any leftover background using either the Eraser tool for manual precision or the Magic Wand tool for quick selection of small remaining areas. Taking a few extra minutes to refine the edges will help you achieve a sharp, polished result that’s ready for e-commerce listings or marketing use.
Once you’ve finished cleaning up the edges of your product image in Paint NET, it’s important to save your file in the correct format. Always choose .PNG when saving, because PNG preserves the transparent background you just created.
Avoid saving as a JPEG, as this format does not support transparency and will fill your background with a solid color, undoing all your careful work. Saving as PNG ensures your product image stays clean and ready for use across e-commerce platforms, websites, and marketing materials.
3. GIMP
GIMP is a free, open-source image editing program available for both Windows and macOS. It offers far more advanced editing capabilities than Preview or Paint NET, making it a strong, legitimate alternative to Adobe Photoshop for product photo editing.
To start removing a background in GIMP, first open your image in the program. Before deleting the background, you need to add an Alpha Channel, which allows the image to support transparency. Go to the menu and select:
Layer → Transparency → Add Alpha Channel
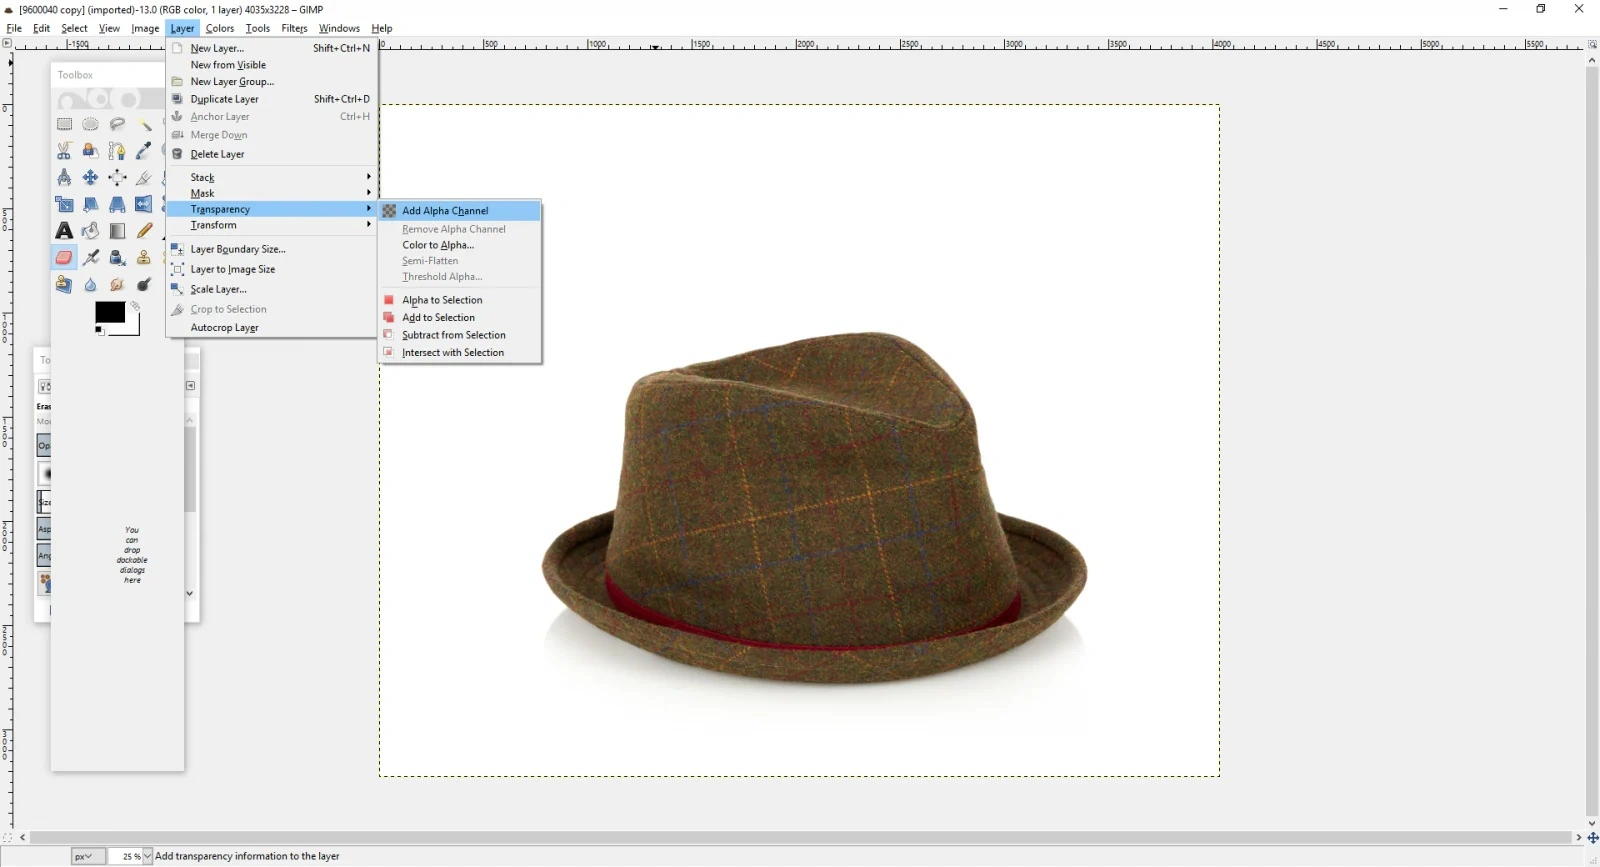
Adding the Alpha Channel ensures that when you remove the existing background, GIMP will replace it with transparency instead of filling it with a solid color. This is a crucial step for creating clean, professional product images ready for e-commerce use.
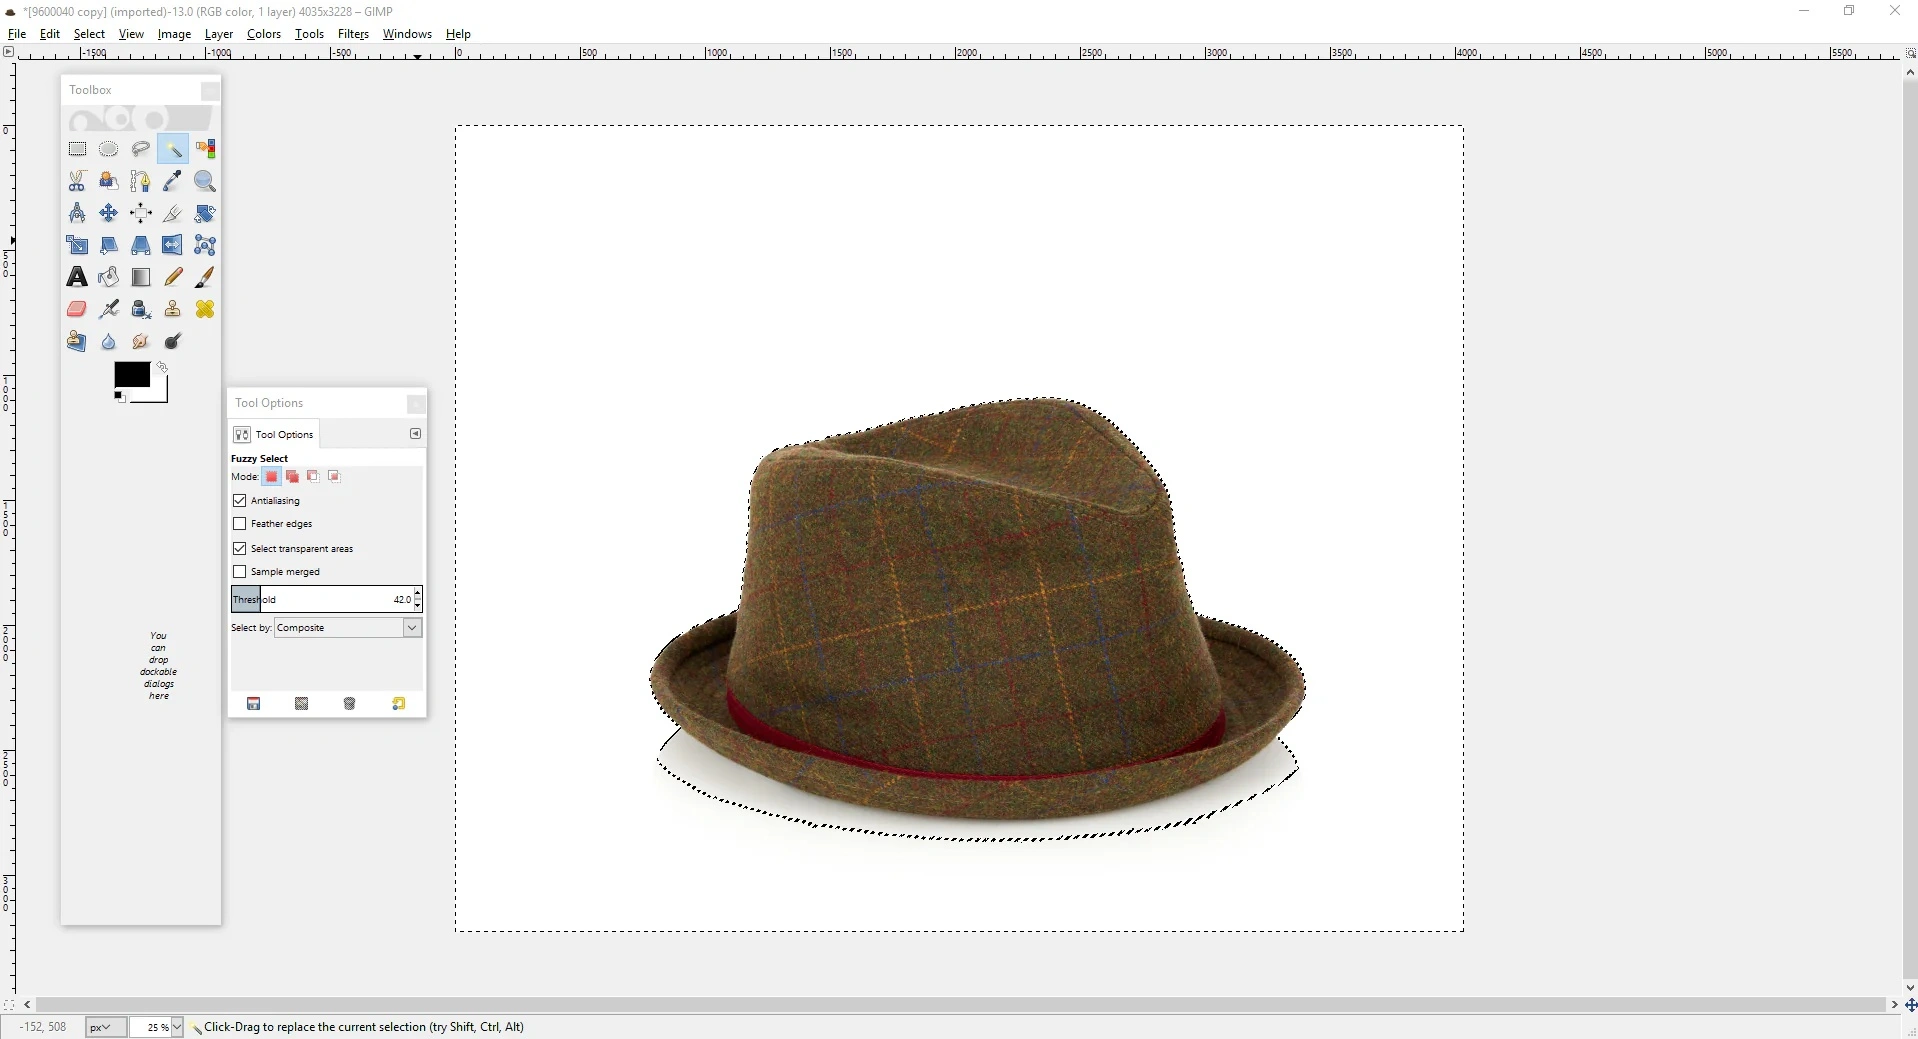
Once you’ve added an Alpha Channel in GIMP, it’s time to select the background for removal.
- Open your Toolbox and choose the Fuzzy Select Tool (often called the magic wand in other programs).
- Click on the background area you want to remove. The Fuzzy Select Tool detects regions of similar color and selects them automatically.
- Adjust the Threshold setting as needed. A higher threshold selects a broader range of colors, while a lower threshold is more precise — this helps prevent accidentally selecting parts of your product.
- Once the background is selected, press the Delete key to remove it.
Repeat this process for any remaining background areas until your product is isolated on a transparent canvas. This method allows for accurate, professional background removal even for images with varied backgrounds.
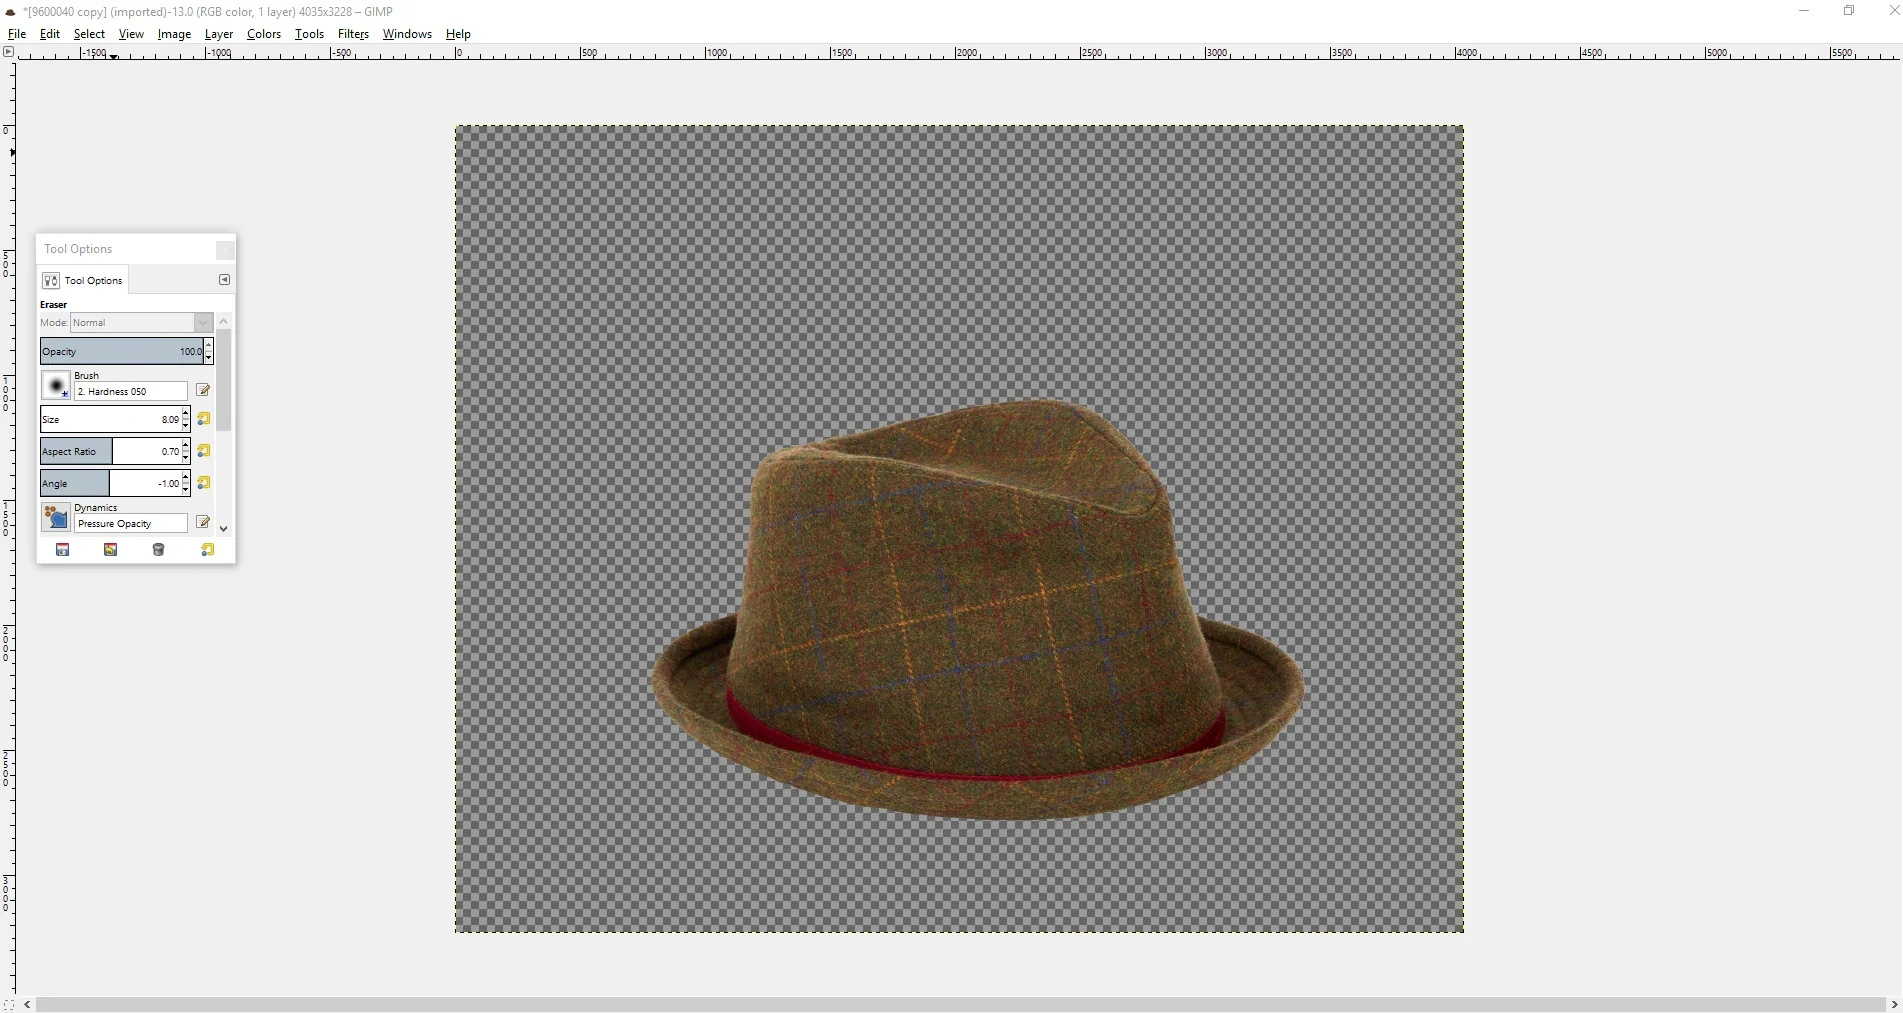
After using the Fuzzy Select Tool in GIMP, you may notice small leftover areas along the edges of your product. To clean these up, use the Eraser Tool to carefully remove any remaining background fragments.
Once your image edges are fully refined and your product is cleanly isolated, make sure to save your file as a PNG. This is essential because PNG preserves the transparent background, whereas formats like JPEG will replace it with a solid color, undoing all your careful editing.
4. Adobe Photoshop
Adobe Photoshop is the industry-standard tool for professional graphic designers and photographers worldwide. Unlike the free options we’ve discussed, Photoshop is part of Adobe’s Creative Cloud suite and requires a monthly subscription starting at $10. However, it offers full control and advanced features that make it the top choice for high-quality product photo editing for professionals.
For precise background removal, Photoshop relies on two main selection tools:
- Magic Wand Tool – Ideal for selecting large, uniform areas of the background. It works quickly but may struggle with finer details, such as thin edges or intricate textures like shoelaces.
- Pen Tool – Perfect for tracing curves and detailed shapes. Use the Pen Tool to carefully outline complex areas, including grooves, bumps, and rounded edges of your product.
Step 1: Duplicate the Background Layer

Before starting the selection process, duplicate your background layer. This ensures that you only remove the background and keep your original product layer intact, allowing for easier editing and adjustments later.
By combining the Magic Wand and Pen Tool techniques, Photoshop allows you to achieve professional, clean, and precise background removal, making your product images stand out for e-commerce or marketing purposes.
To begin separating your product from the background in Adobe Photoshop, start with the Magic Wand Tool.
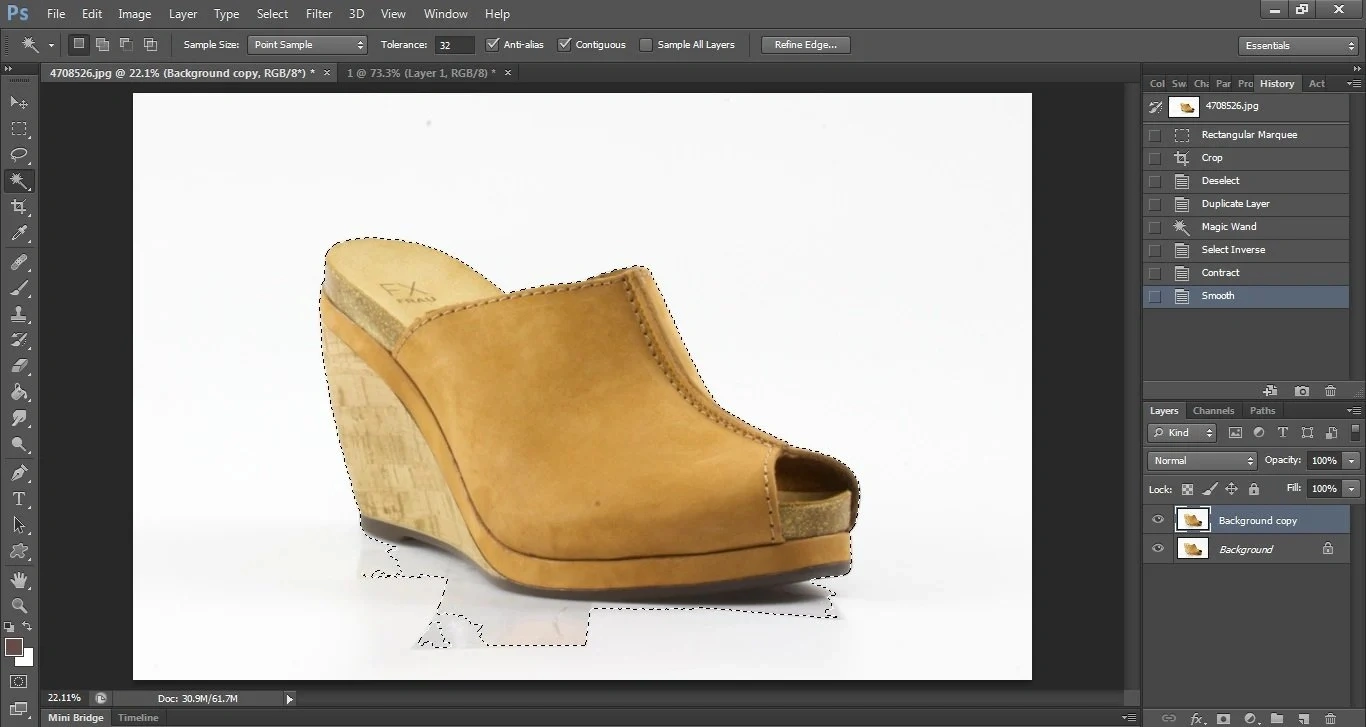
Click on the background area surrounding your product to quickly select the general shape. This tool works best on large, uniform background areas and helps outline the product’s overall form. While it won’t capture all the fine details — like edges, curves, or textures — it provides a fast starting point for isolating your product before refining the selection with more precise tools.
After using the Magic Wand Tool in Adobe Photoshop, you may notice that while most of the shoe is selected, some background areas are also included. To fix this, we refine the selection using the Pen Tool.
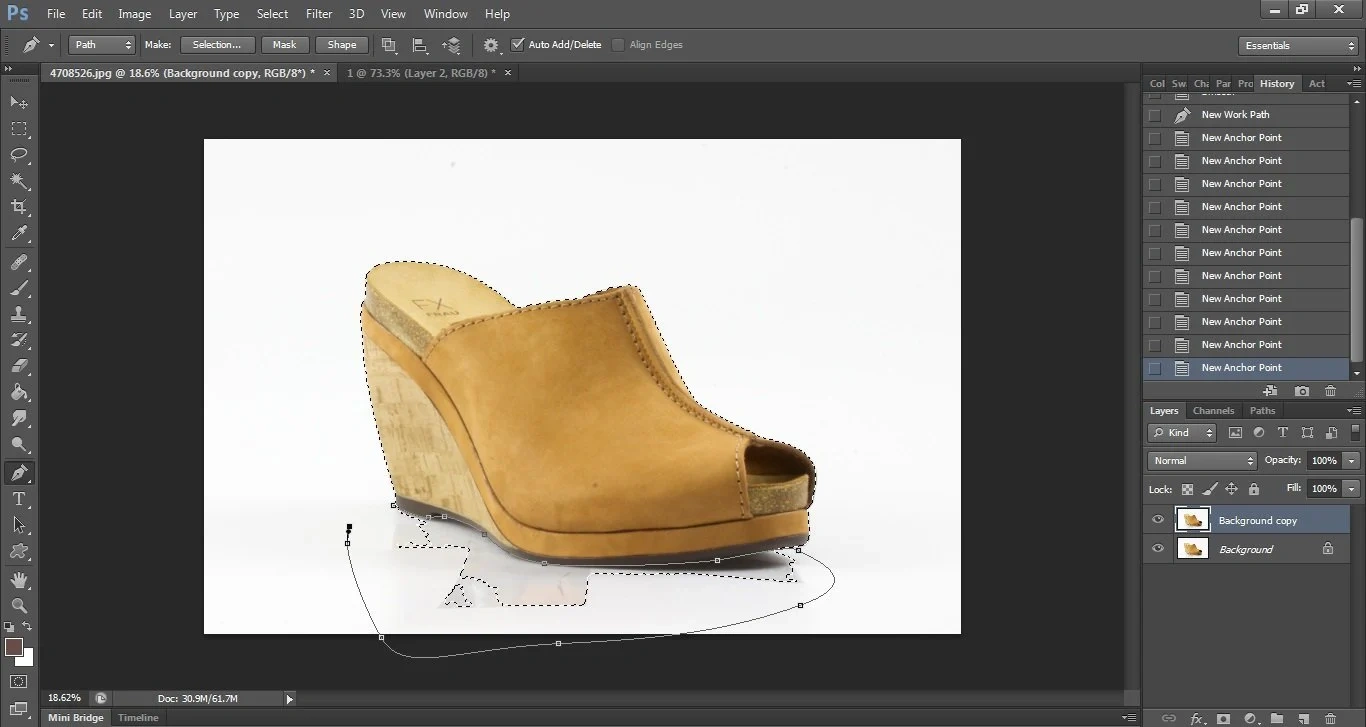
With the Pen Tool, carefully draw a precise path around the part of the product you want to keep — for example, the sole of the shoe and any curves, grooves, or intricate edges. Once the product is outlined perfectly, you can complete the path around any remaining background areas that were mistakenly selected. This ensures that only your product is included in the final selection, leaving the background ready for removal.
Once you’ve carefully traced the background area with the Pen Tool in Adobe Photoshop, right-click on your path and choose “Make Selection.”
Next, select “Subtract from Selection” to remove the background portion from your original selection. This process leaves you with a perfectly refined outline around your product — in this case, the shoe — ensuring that only the product remains selected while all unwanted background is excluded.
This step is essential for achieving a clean, professional clipping path that looks polished and ready for e-commerce or marketing visuals.
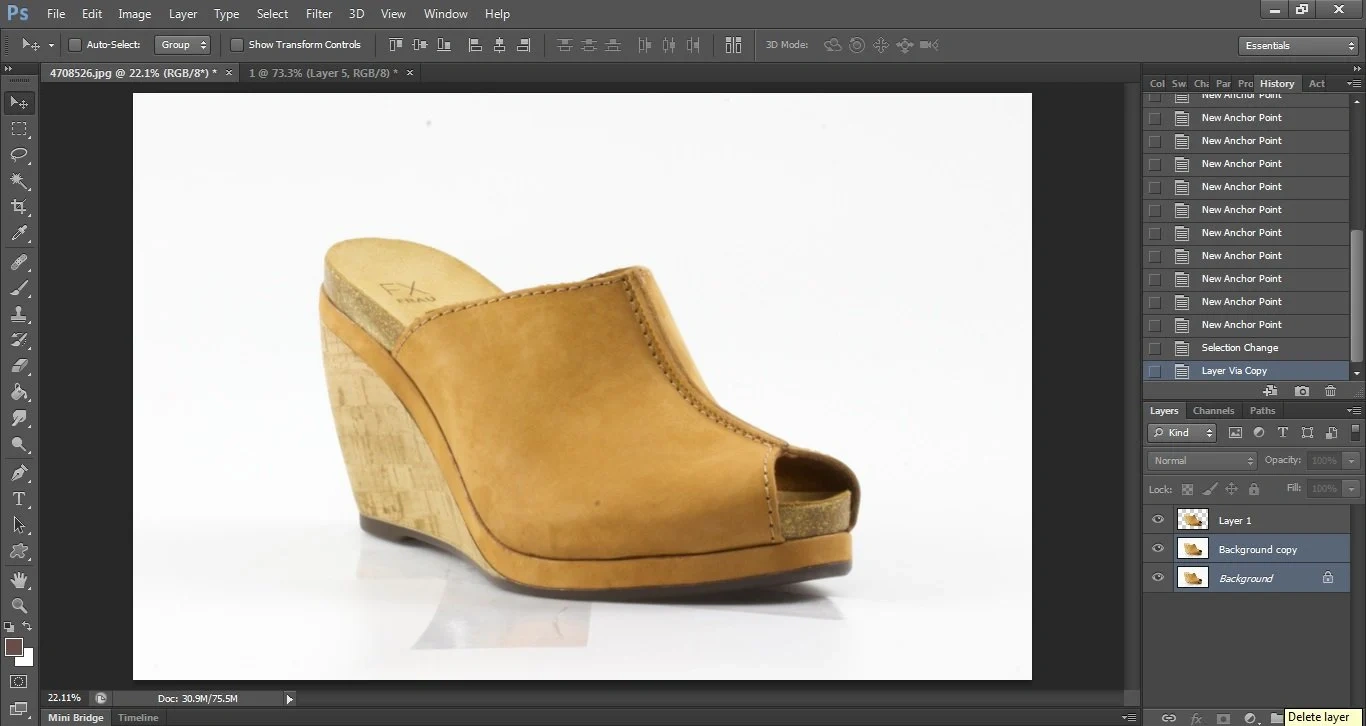
The result of refining your selection with the Pen Tool and subtracting the background in Adobe Photoshop is a perfect outline of your product.
With this precise selection in place, you can now safely delete the background, leaving your product isolated on a transparent canvas. This clean cutout is ideal for e-commerce listings, marketing materials, or any platform where a professional, distraction-free product image is needed.
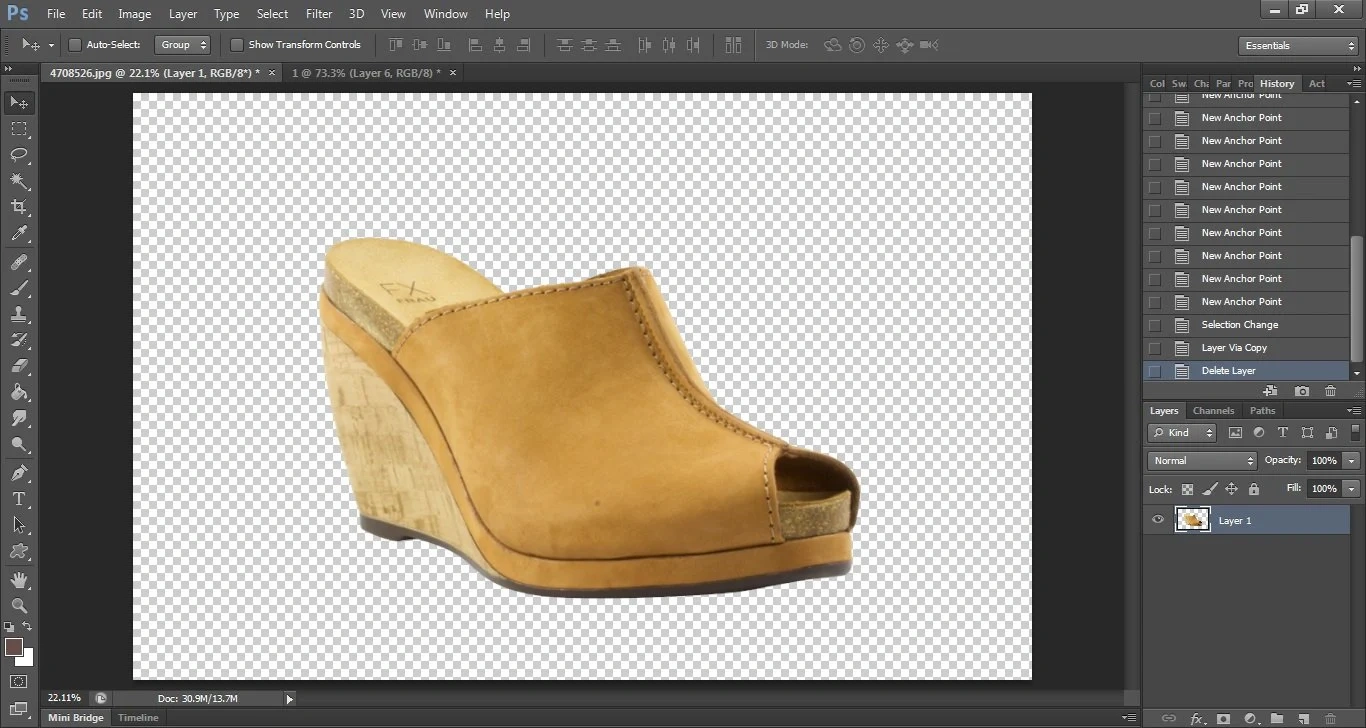
Now that your selection is perfectly refined in Adobe Photoshop, it’s time to remove the background. Simply click on the background area and press Delete, then remove the original background layer. Once that’s done, you’ll be left with a clean product image on a transparent background, ready for use in e-commerce or marketing.
Start Your Free Trial with Cutout Partner Background Removal Services
In today’s fast-paced e-commerce world, high-quality product images are no longer optional — they are essential. Clean, professional visuals not only grab attention but also increase customer trust and sales. One of the most effective ways to enhance your product images is through background removal, and Cutout Partner is the go-to service for businesses worldwide looking for perfection.
Cutout Partner specializes in background removal services for all types of product photos. Whether you sell jewelry, fashion, electronics, or home goods, our expert team ensures your products stand out against a clean, distraction-free background. We serve clients across the USA, UK, Australia, Canada, and worldwide, providing reliable, fast, and professional results for e-commerce businesses, photographers, and marketers.
Why Background Removal Matters
A product image with a busy or inconsistent background can reduce its appeal and impact. By removing the background:
- Your products become the center of attention
- Images are easier to integrate across websites, marketplaces, and social media
- Your website or online store loads faster
- Photos look consistent and professional, improving brand credibility
Clean, transparent backgrounds are particularly important for e-commerce marketplaces like Amazon, eBay, Shopify, and Etsy, where polished visuals can significantly boost your conversion rates.
What Makes Cutout Partner Different?
While there are many DIY tools and software solutions, professional background removal requires precision, attention to detail, and expertise. That’s where Cutout Partner excels:
- Expert Editing: Our team meticulously removes backgrounds while preserving fine details, shadows, and product edges.
- Fast Turnaround: We understand time is money, so we deliver high-quality results quickly.
- Affordable Pricing: Professional photo editing doesn’t have to break the bank.
- Global Reach: Whether you’re in the USA, UK, Australia, Canada, or anywhere else, we serve clients worldwide.
Start Your Free Trial Today
Not sure if professional background removal is right for your business? Cutout Partner offers a free trial so you can experience our quality first-hand. Submit a few product images, and our experts will edit them to perfection — showing you the difference professional background removal can make.
With Cutout Partner, you don’t just get images — you get sales-ready, polished visuals that elevate your brand. Whether you’re a small business or a large e-commerce platform, our team is ready to help your products shine.
Don’t wait to improve your product images. Start your free trial with Cutout Partner today and see why businesses around the world trust us for background removal services.
Take the Next Step
Whether you’re using free tools like Preview, Paint.NET, or GIMP, or professional software like Photoshop, taking the time to improve your product images is a step in the right direction.
Background removal is just the beginning. After mastering this skill, focus on consistent cropping, sizing, alignment, and margins to create professional-looking product images across your online store.
Remember — there’s always more to learn, and every improvement you make to your images can directly benefit your business.
Have more questions about editing product photos? Drop a comment below or visit your store for hands-on guidance!
FAQ: How to Remove Background from Product Photos
1. Why should I remove the background from my product photos?
Removing the background creates clean, professional images that highlight your product, improve e-commerce listing quality, enhance page load speed, and make your visuals easy to use across websites, social media, and marketing materials.
2. What software can I use to remove backgrounds?
You can choose from a range of tools depending on your skill level and budget:
- Free options: Preview (Mac), Paint.NET (Windows), GIMP (Mac/Windows)
- Professional options: Adobe Photoshop, Adobe Illustrator
- AI-powered tools: Remove.bg, Canva, Adobe Express
3. Do I need special skills to remove a background?
Not necessarily. Beginner-friendly tools like Preview or AI-based background removers can do the job with minimal skill. For complex images or professional quality, learning tools like Photoshop or GIMP is recommended.
4. Which file format should I save my images in?
Always save your product photos as PNG if you want to preserve the transparent background. JPEGs do not support transparency and will fill the background with a solid color.
5. Can I remove the background from images with busy or complex backgrounds?
Yes, but it requires more advanced tools like Photoshop or GIMP. Using selection tools like the Pen Tool, Fuzzy Select, or AI-based masking features can help isolate your product cleanly.
6. Is there a quick way to remove backgrounds for multiple images?
Yes. Batch processing is available in Photoshop and some AI tools (like Remove.bg). Professional photo retouching agencies like Cutout Partner can also handle bulk product photo background removal efficiently.
7. How do I avoid cutting off parts of my product when removing the background?
- Zoom in and work carefully around the edges
- Use refining tools like Pen Tool, Select and Mask, or Eraser Tool
- Adjust tolerance settings in tools like Magic Wand or Fuzzy Select to avoid over-selecting
8. What is the difference between free tools and professional tools for background removal?
- Free tools: Quick, easy, ideal for simple backgrounds or small projects
- Professional tools: Offer precise control, complex selection options, layer masking, and high-quality output suitable for e-commerce, catalogs, and marketing
9. Can I remove backgrounds on my phone or tablet?
Yes. Tools like Canva, Adobe Express, and mobile versions of Photoshop allow you to remove backgrounds on the go. AI-powered apps are especially beginner-friendly for mobile users.
10. Should I hire a professional for background removal?
If you have hundreds of product photos, need consistent high-quality results, or want to save time, hiring a professional retouching service like Cutout Partner is recommended. They provide precise edits, fast turnaround, and ensure a polished, uniform look across all your images.