You walk, you run, and you wear shoes every day. They are essential products in a life that is always on the move. When people shop for shoes online, product photography tips a very important role in helping them decide what to buy. Clear and high-quality images allow customers to see details, style, and design before making a purchase.
For sellers, it is important to present shoes in a way that makes them stand out from competitors. Good photography can highlight unique features, improve visual appeal, and ultimately help increase conversions. The better your product images look, the more likely customers are to trust your brand and choose your products.
In this quick guide on how to photograph shoes like a professional, we will share simple and effective photography tips to help you create clean, attractive, and high-quality images that make your products look their best.
Shoe photography sits between product photography and fashion photography. On one hand, you need to follow certain basic standards to present the product clearly. On the other hand, there is room for creativity to make the images more attractive and engaging.
For online stores and selling platforms, packshot images are commonly used. These are clean product photos taken on a simple, usually plain background. The goal is to clearly show the shoe’s design, color, and details without distractions. Packshots help customers focus on the product itself and understand exactly what they are buying.
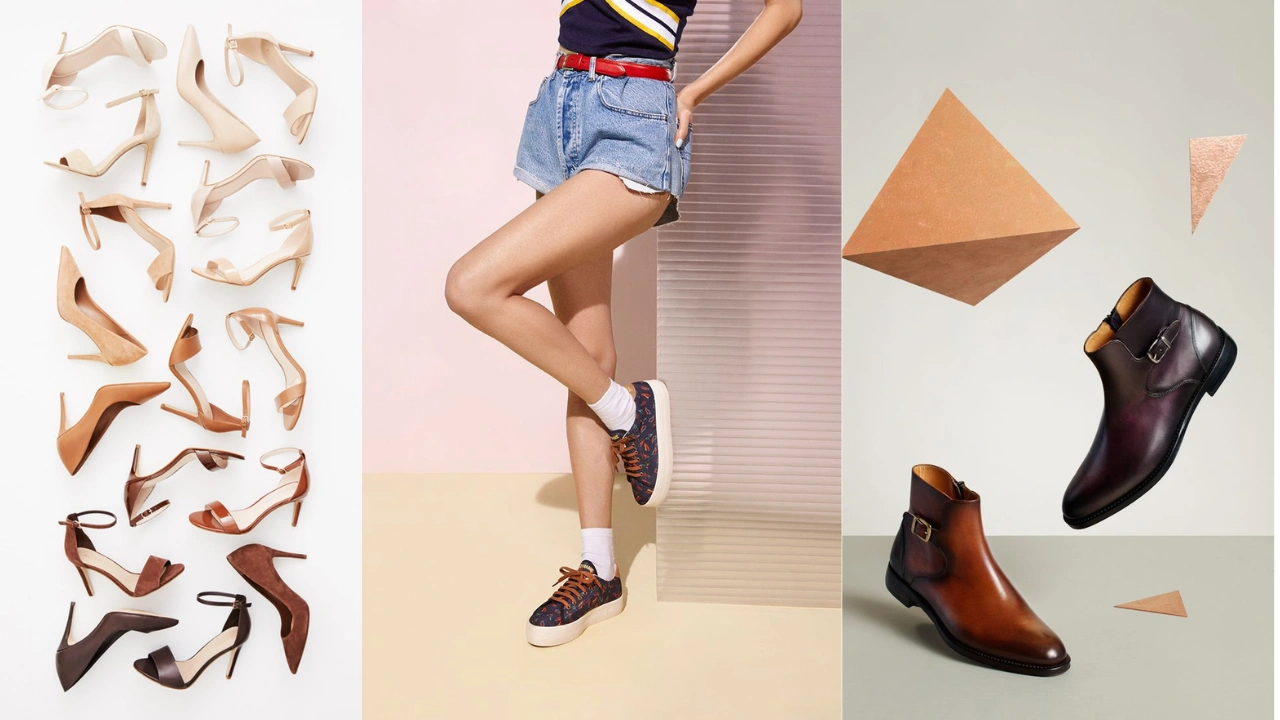
Lookbook photography, however, takes a more creative approach. These images are often styled with different backgrounds, props, and environments. Lookbook shots aim to create a mood or lifestyle feel, showing how the shoes look in real-life situations. This style is commonly used in marketing campaigns, social media, and brand storytelling.
Both styles are important depending on your purpose. Packshots are ideal for clarity and consistency, while lookbook images help build emotion and brand identity. Using a combination of both can give customers a complete view of the product and improve overall presentation.
Lookbook Shoe Photography
Depending on where they are displayed, different styles of shoe photography can influence customers in different ways. Lookbook photography is designed to capture attention and present the product in a creative and visually appealing manner. It often feels more like artistic imagery, offering something fresh, stylish, and interesting to the viewer.
This type of photography can also act as a visual hook on platforms like Instagram or in online ads, where grabbing attention quickly is very important. You may have noticed the growing trend of tagging shoe photos with hashtags like This represents lookbook-style images that focus on lifestyle, creativity, and presentation rather than just the product itself.
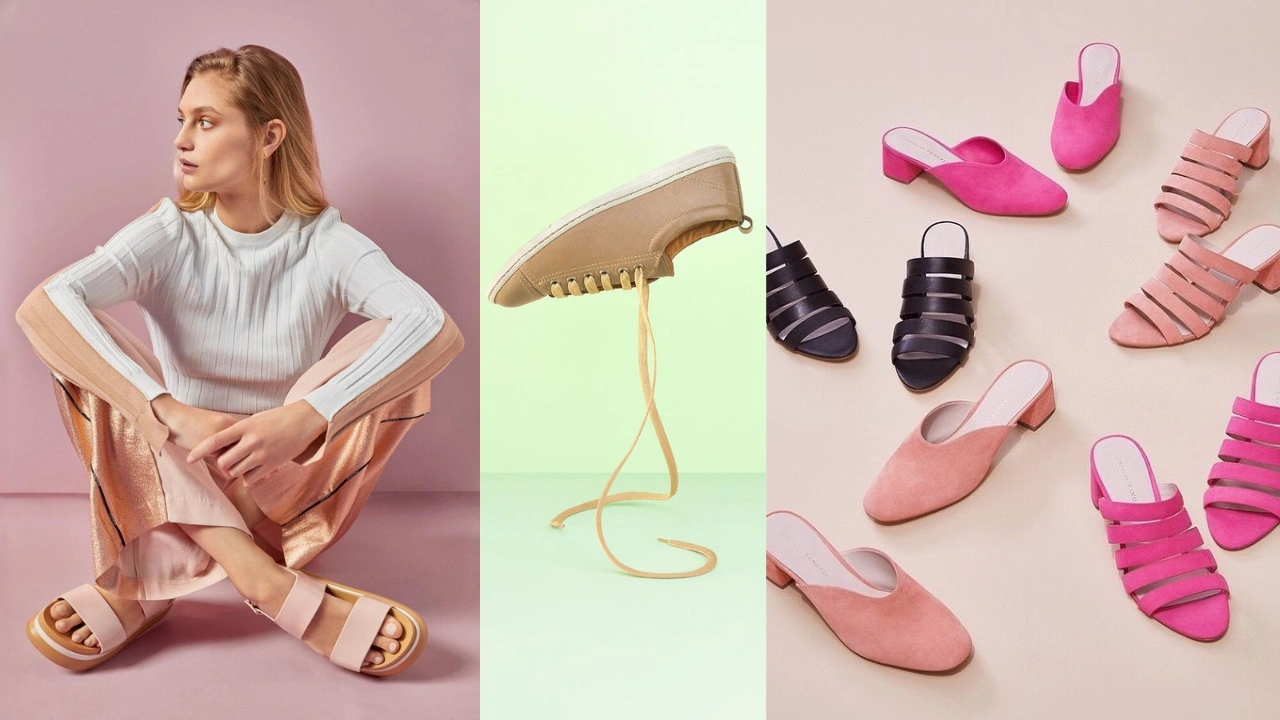
If you are selling shoes on social media platforms, having only plain product images with white backgrounds may not be enough. While clean images are important, customers are often more drawn to vibrant, styled visuals that show the product in a real-life or creative setting. Attractive lookbook photography helps make your brand stand out and encourages customers to engage and make a purchase.
Packshots of Shoes
Selling platforms like Amazon or Allegro come with specific requirements for product images. One of the most common formats is the packshot, which usually features shoes on a clean white background with clear, consistent angles. In these cases, there is very little room for creativity, as the focus is mainly on presenting the product in a simple and professional way.
Packshot shoe photography also requires careful post-production work. This often includes background removal and precise editing, such as creating a clipping path in Photoshop or using background removal techniques. The goal is to keep the image clean, sharp, and suitable for eCommerce listings.
In packshots, shoes should be shown in a clear and neutral way. It is important to display accurate colors, visible textures, and fine details so customers know exactly what they are purchasing. Since these images are meant to inform rather than impress creatively, clarity is the top priority.
Photographers should also consider using different angles to highlight key features like laces, logos, stitching, and material folds. Proper lighting plays an important role as well. Soft, even lighting helps show the overall shape, while angled lighting can create subtle shadows that reveal texture. Including multiple views, such as side, top, and even bottom angles, can give customers a complete understanding of the product.
General with Fashion Shoe Photography Tips for the Footwear Industry
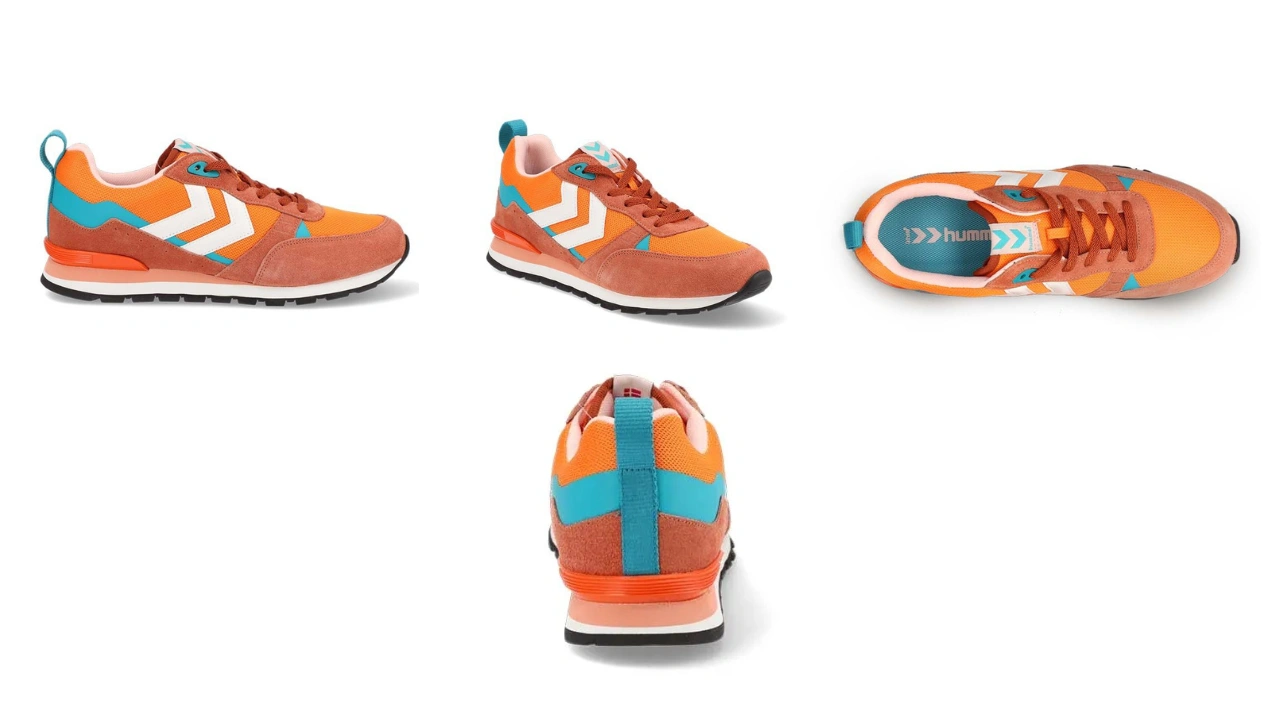
In footwear photography, consistency is very important. When all product images are taken from similar angles, your store looks more organized, professional, and visually appealing. Consistent presentation also helps customers compare products more easily and builds trust in your brand.
The most commonly used angles in shoe photography include the right-side view, back view, and the 45-degree angle. These perspectives give customers a clear understanding of the shoe’s shape, design, and overall appearance. Using these standard angles across your product catalog helps maintain a uniform look throughout your website or online store.
In addition to basic images, it is a good idea to include extra visuals that provide more detail. Rich content such as product videos, 360-degree views, and interactive spins can greatly improve the customer experience. These formats allow buyers to see the product from multiple perspectives, giving them more confidence in their purchase decision.
By combining consistent angles with high-quality visuals and interactive content, you can create a more engaging and professional presentation. This not only improves the look of your store but also helps increase customer trust and boost conversions in the competitive footwear market.
How to Prepare for a Shoe Product Photography Session
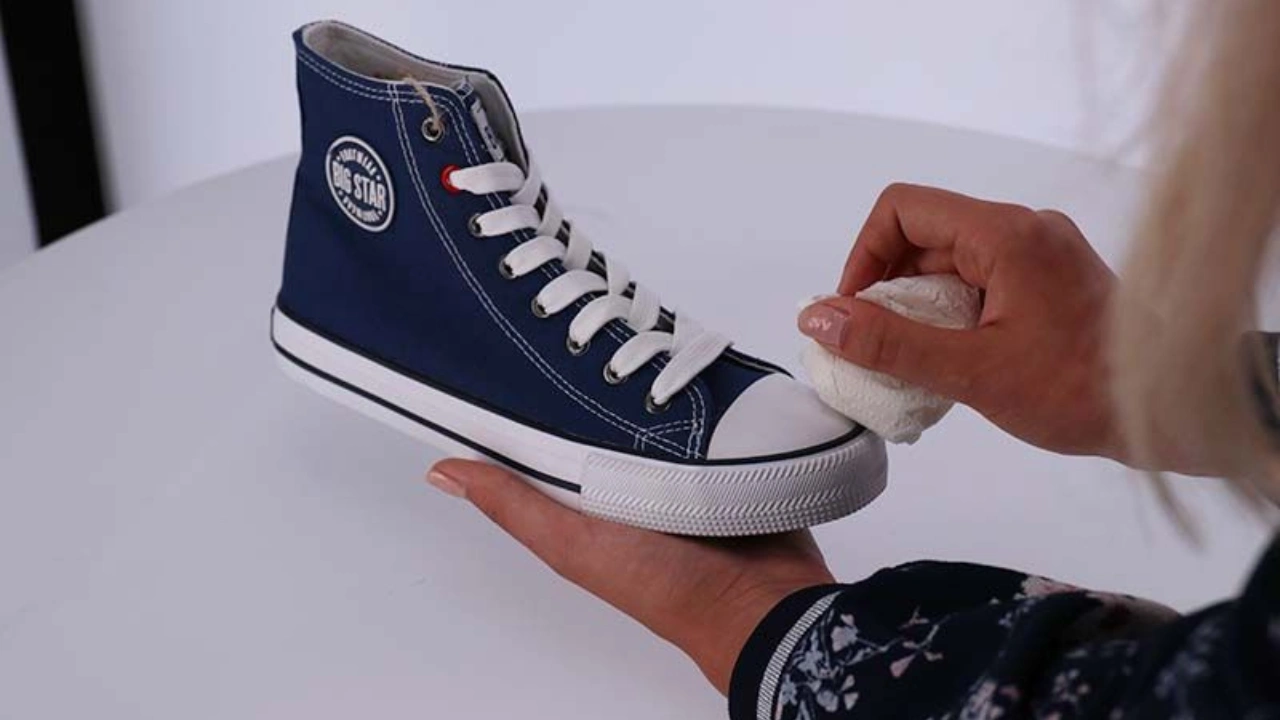
Before starting a shoe product photography session, proper preparation is essential to achieve clean and professional results. The product itself should be carefully cleaned and presented in the best possible condition. Dust removal, polishing, and removing lint are basic but important steps for every pair of shoes.
For leather shoes, applying shoe polish can help create a smooth and attractive shine that looks great in photos. Suede shoes require a different approach—using a soft brush helps align the fibers in one direction, giving the surface a neat and refined appearance. Paying attention to these small details can significantly improve the final image.
It is also important to inspect the shoes closely before shooting. Remove any loose threads, marks, or imperfections that may distract from the product. If you have multiple pairs available, choose the one that looks the most polished, with even soles and well-finished details. Striving for the best possible version of the product will help create more appealing images that attract customers.
Tips and Tricks
Flying Shoelaces
To create the effect of floating shoelaces, you can suspend them using a transparent fishing line. A simple setup using a backdrop stand and tripods can help hold the lines in place. This technique can also be used to create a “walking” effect by slightly lifting the heel of the shoe, adding a dynamic and eye-catching look.
Photographing the Soles
To capture the bottom of the shoe, you can use a stand or support to position the shoe upside down. Photographing from above works well in this setup. For repeated use, a mannequin foot attached to a flat surface like plexiglass can help display the sole clearly and consistently.
Studio Lighting in Shoe Photography
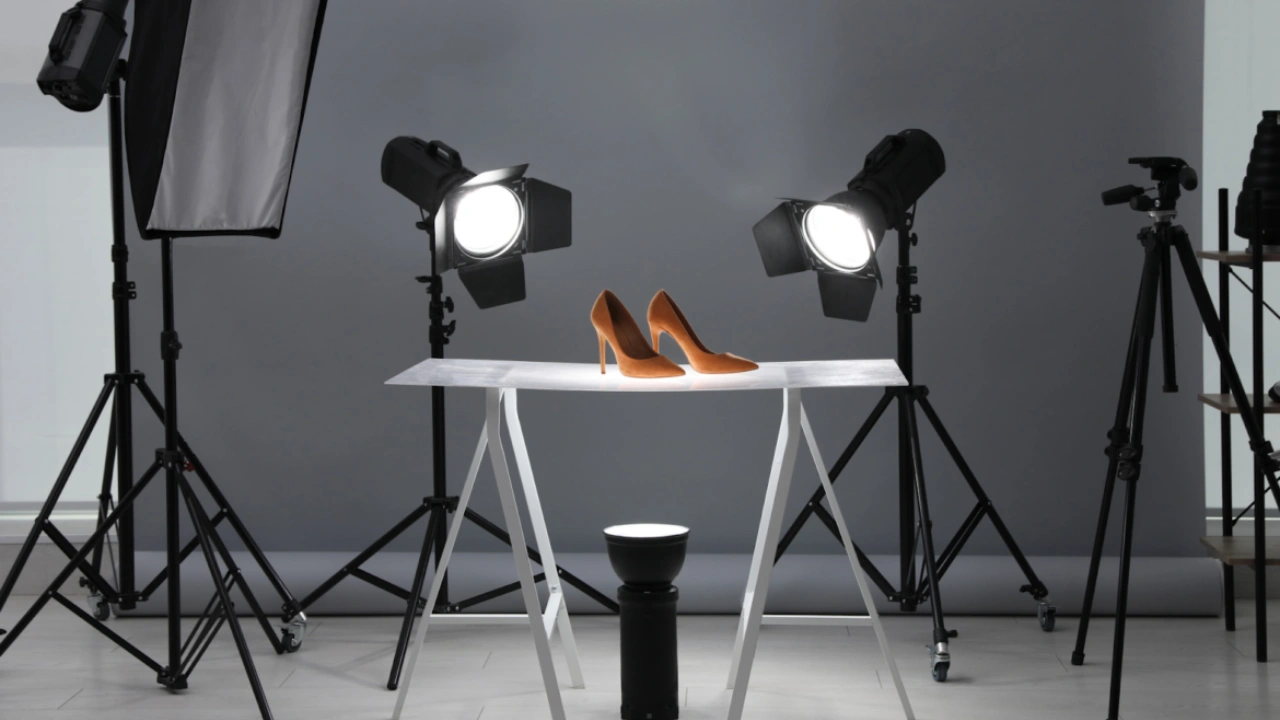
The lighting you use in shoe photography depends on the type of image you are creating. Packshot and lookbook photography require different lighting setups, and understanding the purpose of the shot will help you choose the right lighting style.
For packshot photography, there are a few important tips to follow to achieve clean and professional results.
Tip #1: Light Distribution
Lighting should be even and well-balanced across the entire shoe. This helps avoid harsh shadows and ensures that no part of the product is underexposed. Positioning lights in both the front and back of the shoe helps illuminate all areas, including the heel, for a complete and clear view.
Tip #2: Color Accuracy
Accurate color representation is essential in product photography. The lighting should reflect the true color of the shoe without distortion. A color temperature around 5500K, similar to natural daylight, along with a high Color Rendering Index (CRI above 95), helps maintain realistic and consistent colors.
Tip #3: Detail Visibility
Good lighting should also highlight the texture and fine details of the shoe. This creates a more realistic and “close-to-touch” feel for the viewer. Using light from both sides and positioning it at an angle between 35 and 55 degrees can effectively bring out textures and material details.
Tip #4: Right Angle Matters
Avoid lighting the product directly from the front at a straight “en face” angle. When light hits the shoe head-on, it can make the image look flat and reduce the sense of depth. As a result, important details and textures may not stand out clearly.
Instead, try positioning your lights at an angle to create soft shadows and highlights. This helps reveal the shape, structure, and material of the shoe, giving the image a more natural and three-dimensional look. Proper angled lighting enhances the overall “touch-and-feel” quality, making the product more appealing and realistic to viewers.
Camera Parameters
Before adjusting camera settings for a footwear photoshoot, it is important to first decide on the angle you want to use. This includes choosing the right focal length and positioning the camera properly in relation to the product.
In most cases, the ideal camera angle falls somewhere between a very high position and a very low position. Once you select a suitable angle, it is important to maintain consistency across all your shots. Keeping the same camera height and perspective helps create a uniform and professional look for your entire set of images.
By carefully selecting and repeating your chosen angle, you ensure that all product photos look cohesive, well-structured, and visually consistent, which is especially important for eCommerce and catalog photography.
Focal Length in Shoe Photography
The ideal focal length for shoe photography is generally around 50 mm. This range provides a natural and realistic look while helping to avoid noticeable distortion. Using a focal length close to 50 mm ensures that the shape and proportions of the shoe are represented accurately, giving viewers a true-to-life impression of the product.
Selecting the correct focal length also helps reduce lens limitations and keeps the product as the main focus of the image. Wide-angle lenses can sometimes distort the appearance of the shoe, making it look stretched or slightly unnatural. On the other hand, very long focal lengths can compress the image too much, reducing depth and detail.
By staying near the 50 mm focal length, photographers can achieve clear, balanced, and professional results. This is especially important in eCommerce photography, where accurate representation and visual clarity help customers better understand the product and make confident purchasing decisions.
Shoe Photography Camera Settings with Tripod
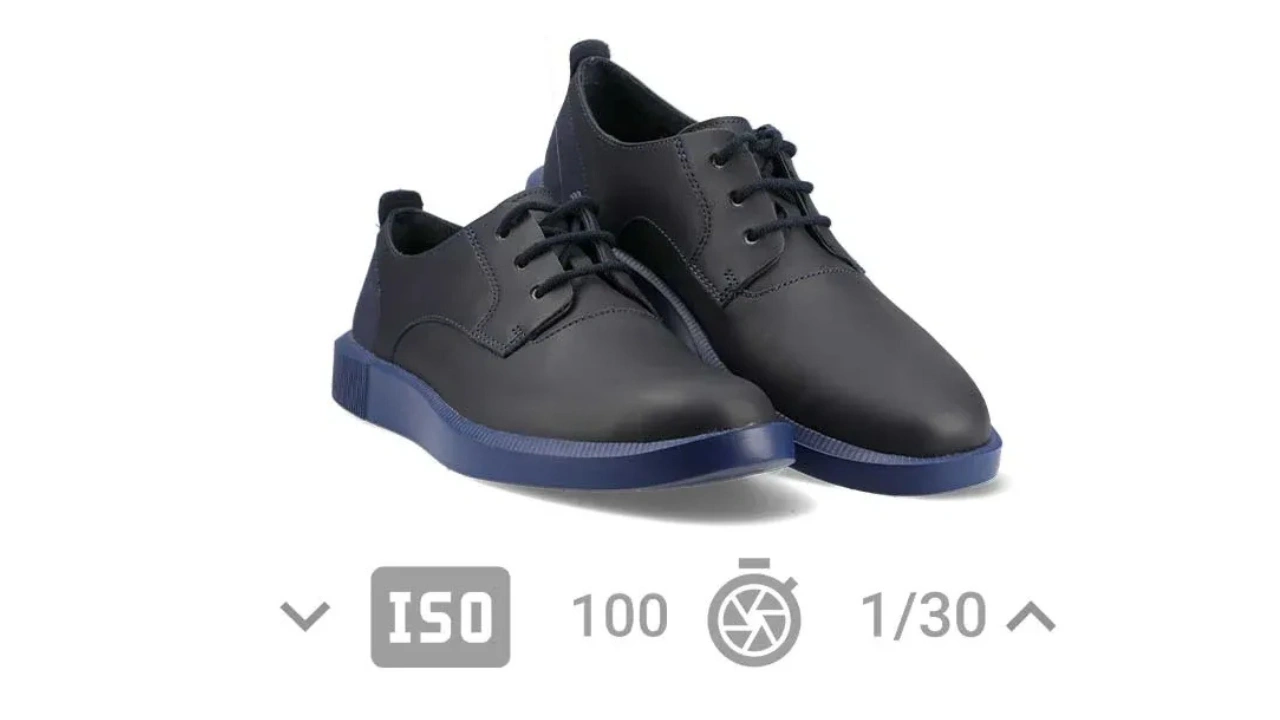
When photographing shoes, camera settings play an important role in achieving sharp and professional results. One of the key factors to consider is the aperture, which affects the focus and depth of field in your image. For shoe photography, an aperture range between f/14 and f/16 is generally recommended. This range helps ensure that the entire shoe remains in sharp focus from front to back.
Using a higher aperture is usually not necessary, as shoes are large enough to stay in focus without requiring extreme settings. This also means that techniques like focus stacking are typically not needed, since a single well-set image can capture the full detail of the product.
ISO should be kept as low as possible, with ISO 100 being the ideal standard. Keeping ISO low helps maintain image quality and reduces noise, resulting in cleaner and more professional-looking photos. The shutter speed can then be adjusted accordingly to balance the exposure based on your lighting setup.
By carefully managing aperture, ISO, and shutter speed, you can create well-exposed, sharp, and high-quality shoe images suitable for eCommerce and product presentation.

A tripod is highly recommended for maintaining consistency between shots. It helps keep the camera stable in the same position, ensuring repeatable and uniform images across your entire photoshoot. This is especially important when photographing multiple products or capturing different angles of the same shoe.
Using a tripod also allows you to work with longer exposure times, such as 1/50 or 1/30 seconds, without introducing camera shake or blur. This is particularly useful in controlled lighting setups where slower shutter speeds can help achieve proper exposure while keeping ISO low for better image quality.
Overall, a tripod improves stability, consistency, and sharpness, making it an essential tool for professional shoe photography.
Background Removal
Background removal is an important but often overlooked part of shoe photography, especially for eCommerce. Many online stores require product images with clean white backgrounds, which help keep the focus entirely on the shoes. Proper background removal ensures that the product looks neat, professional, and consistent across listings.
There are different ways to achieve a white background, including editing the image in post-production. Tools like Photoshop can be used to carefully cut out the product and remove distractions from the background. This process helps create a clean and uniform look that meets marketplace standards.
However, relying only on post-processing can sometimes be time-consuming if not planned properly during the shoot. That’s why it’s important to consider background setup while photographing. Without proper preparation, background removal can become more difficult and may affect the final quality of the image.
Equipment Needs
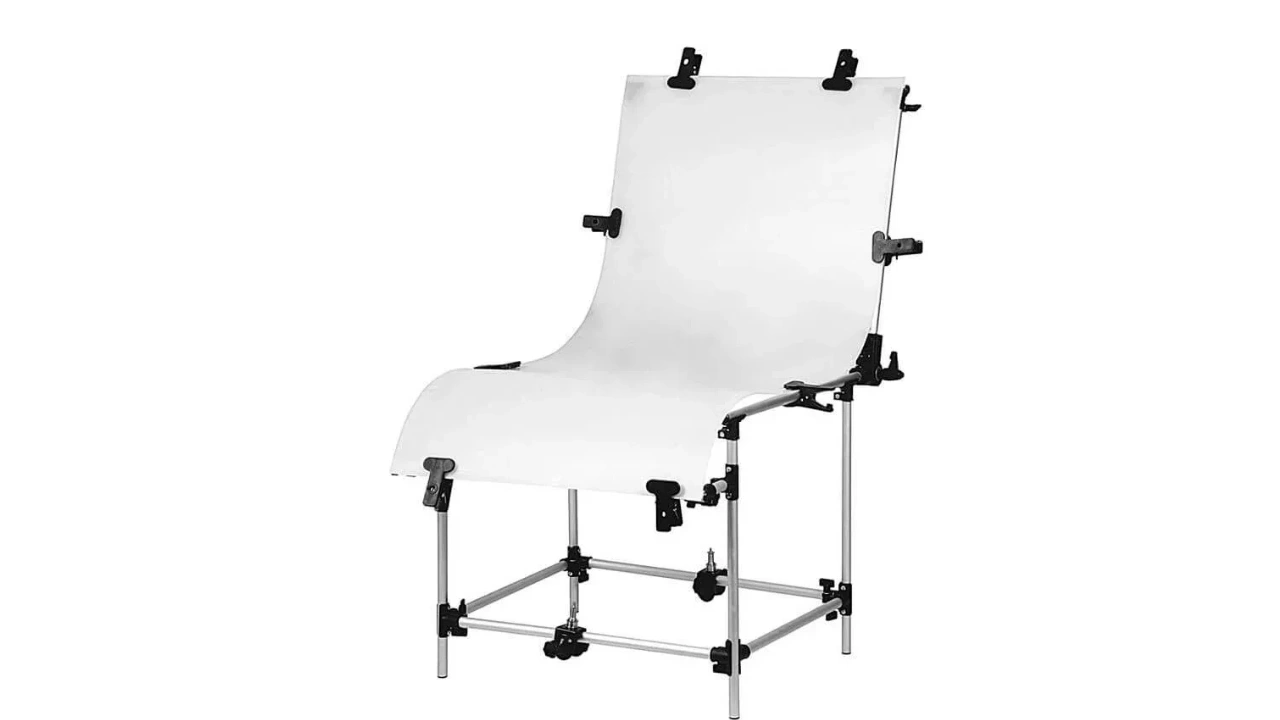
To capture shoes on a white background effectively, having the right equipment is essential. Common tools include plexiglass tables, light tents made of white fabric, and lightboxes. These setups help create even lighting and minimize shadows, making it easier to achieve a clean background.
Additionally, using different colored or textured backdrops can be helpful if you want to create more variety in your product images. While white backgrounds are standard for eCommerce, alternative backgrounds can be useful for lookbooks, marketing materials, or social media content.
By combining proper equipment with careful editing, you can produce high-quality shoe images that are clean, consistent, and visually appealing.
Contrast Loss
Contrast loss can occur during a shoe photography session when lighting and post-production settings are not properly balanced. This issue is especially common with glossy or highly reflective shoes. If the lighting is too strong or uneven, certain areas of the product may become overexposed or “overburnt,” causing important details to disappear.
In addition to exposure problems, contrast loss can also reduce the sharpness of edges in the final image. As a result, the shoe may appear flat or less defined, which can negatively affect the overall quality of the photo. Details such as stitching, textures, and contours may not stand out clearly.

One effective way to address contrast issues is through careful background removal and editing. By isolating the product from its background, you can adjust contrast, brightness, and tones more precisely without affecting the entire image. This helps restore detail and improve clarity.
Proper lighting setup during the shoot is also important to prevent contrast loss from the beginning. Balanced, controlled lighting combined with thoughtful post-processing ensures that the final image remains sharp, detailed, and visually appealing.
Background Uniformity Control
Creating a perfectly white background (RGB 255,255,255) can be challenging in shoe photography. Issues such as lens vignetting, unwanted shadows, and overexposed areas often prevent the background from appearing completely uniform. These imperfections can make the final image look uneven or less professional.
To overcome this, background removal and editing are commonly used. By cutting out the product from its original background, you can easily replace it with a clean white or any other color that suits your brand or platform requirements. This approach helps maintain a consistent and polished appearance across all product images.
Background uniformity also improves repeatability, especially when photographing multiple products in a series. As the product changes, maintaining the same background style ensures that all images look cohesive and aligned.
By combining proper lighting techniques during the shoot with effective post-production editing, you can achieve a clean, uniform background that enhances the overall presentation of your shoe images and keeps the focus on the product itself.
Lighting Focus: On the Background or the Product?
When setting up lighting for shoe photography without background removal, one of the key decisions is where to prioritize the light—on the product or on the background. Achieving perfect exposure in both areas at the same time is often difficult. If you focus too much on the background, the product may appear underexposed or dull. On the other hand, prioritizing the product can result in a background that is not perfectly white.

This challenge is common in packshot photography, where clean and consistent presentation is essential. In many cases, photographers choose to focus lighting on the product to ensure accurate color, texture, and detail. The background can then be refined later through post-production techniques.
Using editing software or background removal services helps solve this issue effectively. By isolating the shoe and adjusting the background separately, you can achieve both a well-lit product and a clean, uniform background. This approach ensures your images remain sharp, professional, and visually appealing while maintaining flexibility for different platforms and design needs.
Conclusion: How to Photograph Shoes
Shoe photography combines technical precision with creative presentation, making it a vital part of successful product imagery. Whether you are creating clean packshots for eCommerce platforms or dynamic lookbook visuals for social media, the key is to maintain consistency, proper lighting, and accurate camera settings. These elements ensure that every image clearly represents the product while maintaining a professional standard.
Post-production also plays an important role in refining images, from background removal to color correction, helping achieve a polished and uniform look. At the same time, creative angles and styling can enhance visual appeal and attract potential customers.
By balancing technical control with creative experimentation, photographers can produce high-quality shoe images that not only showcase details but also build trust and drive conversions in a competitive online market.
Shoe product photography typically requires 7–8 angles per listing, including side profile, three-quarter view, front, back, top-down, sole, detail, and lifestyle shots. Each angle serves a specific purpose in helping customers evaluate fit, structure, and design. In addition, material-specific lighting is essential—diffused panels work best for reflective surfaces like patent leather, while directional lighting helps reveal texture in materials like suede. Careful styling is equally important, involving proper stuffing to maintain shape, consistent lacing, and the use of invisible supports to achieve clean, professional compositions.
For brands managing large catalogs with dozens or even hundreds of SKUs across multiple colorways, maintaining this level of consistency through traditional studio workflows can be time-consuming and expensive. Top-level editing solutions such as Cutout Partner enable brands to generate all required angles and color variations from a single high-quality source image. This approach can significantly reduce production time and costs—by up to 95% in some workflows—while ensuring visual consistency that is often difficult to achieve across multiple studio sessions.
The 8 Essential Shoe Photography Angles
Every competitive shoe listing should include 7–8 images. Each angle serves a specific purpose in helping customers evaluate the product.
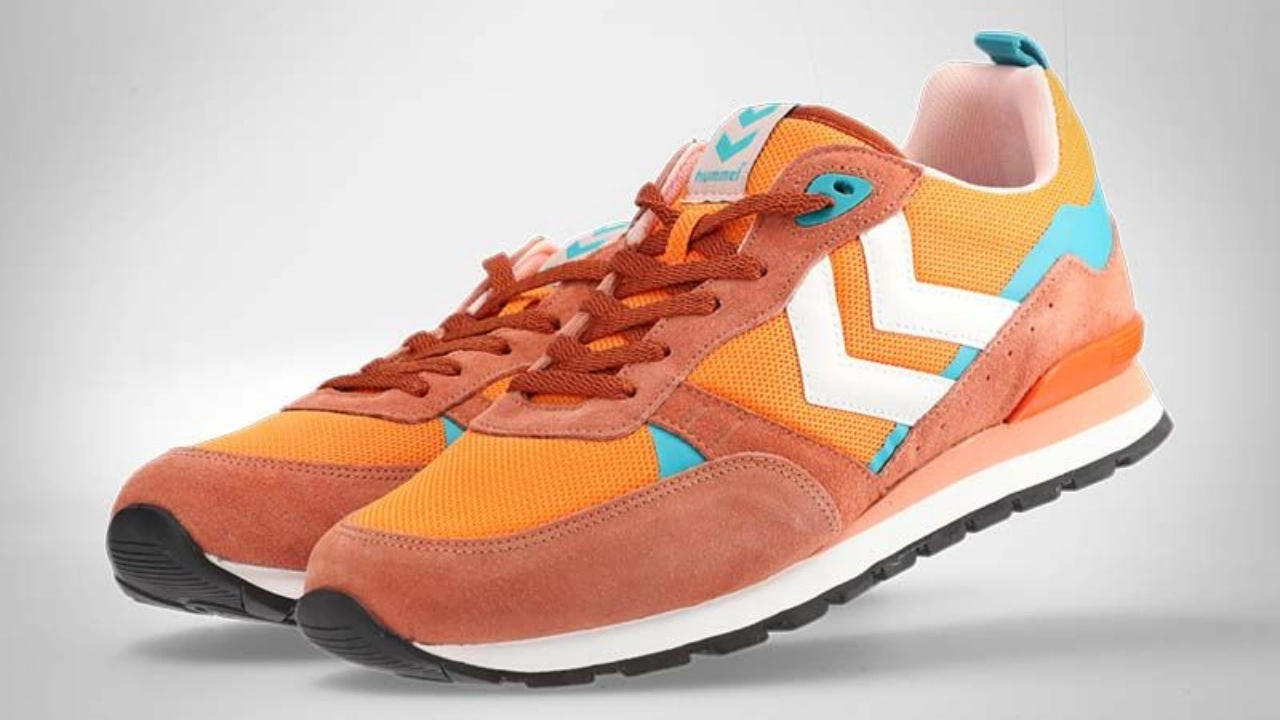
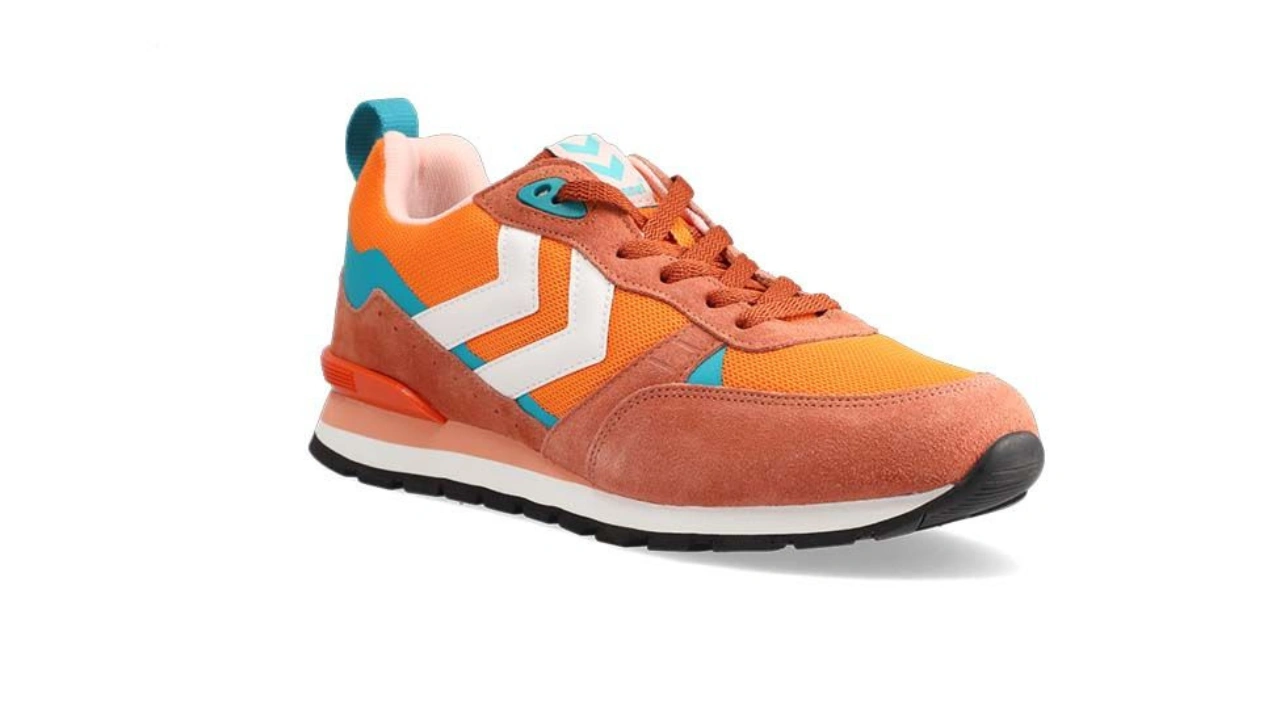
1. Side Profile (Eye-Level, 0°)
The foundational shot that defines the shoe’s identity.
- Captures: silhouette, arch, sole profile, and proportions
- Camera Position: perpendicular to the shoe’s longest axis at shoe height
- Purpose: communicates the overall shape and structure clearly
- Note: Keep the camera at eye level with no tilt or elevation
2. Three-Quarter View (45° Angle, Slightly Elevated)
The most important “hero” image.
- Captures: toe box, side panel, laces, and partial sole
- Camera Position: ~30–45° above and ~45° to the side
- Purpose: most informative single angle
- E-commerce Tip: Often required as the main image (angled product view)
- If limited to one shot, prioritize this angle
3. Front View
Straight-on view of the toe.
- Captures: toe shape, width, lace pattern, tongue
- Purpose: helps customers judge fit and comfort
- Camera Position: directly in front of the shoe at eye level
4. Back / Heel View
Often overlooked but highly valuable.
- Captures: heel height, back branding, pull tabs, structure
- Purpose: shows construction details and design from behind
- Camera Position: directly behind the shoe at shoe height
5. Top-Down (Bird’s Eye, 90°)
Overhead perspective of the shoe.
- Captures: width, toe box shape, lace layout, insole visibility
- Purpose: provides proportion and symmetry not visible from side angles
- Camera Position: directly above the shoe, pointing straight down
6. Sole View
Focus on the bottom of the shoe.
- Captures: tread pattern, sole material, branding
- Purpose: demonstrates durability and traction
- Tip: Can be shot flat or angled to include part of the upper
- Important for compliance in many marketplaces
7. Detail / Close-Up Shots
Highlight craftsmanship and materials.
- Captures: stitching, textures, logos, buckles, eyelets
- Recommended: 2–3 detail shots per shoe
- Purpose: showcases quality and fine features
- Tip: Use a macro lens or close-focus capability
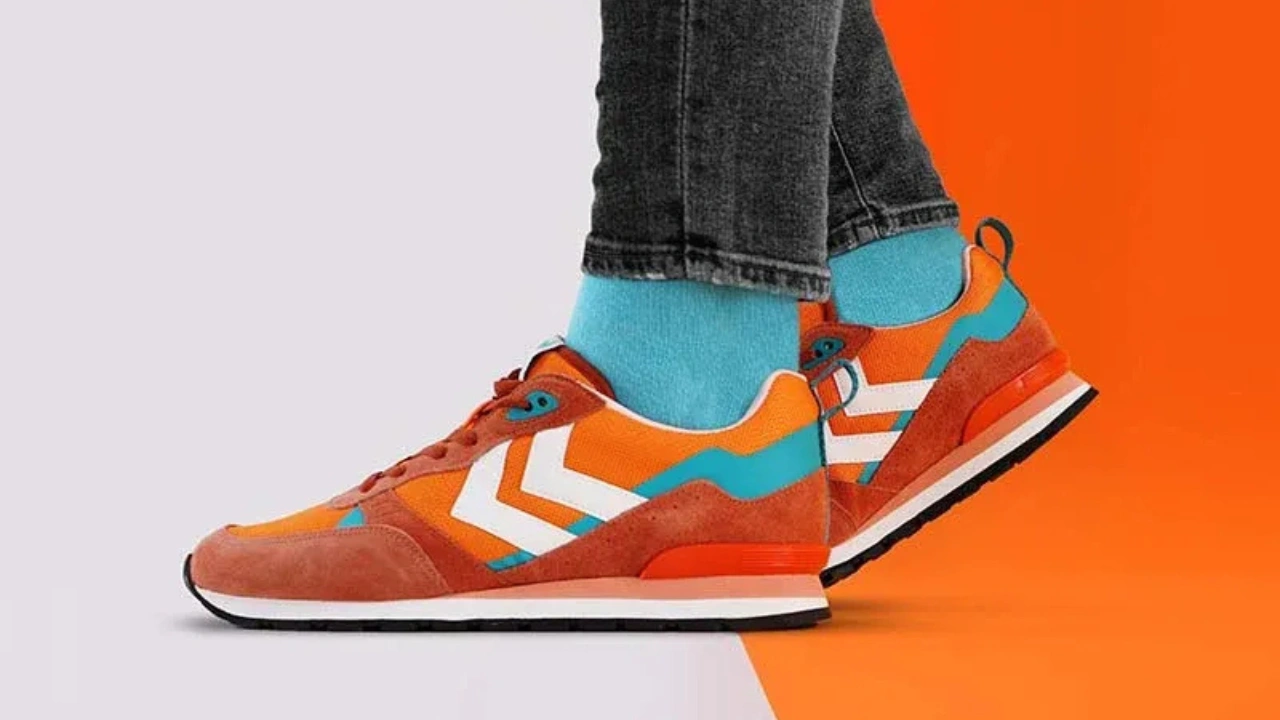
8. Lifestyle / On-Foot Shot
Brings the product to life.
- Captures: real-world usage, fit, and scale
- Purpose: helps customers visualize wearing the shoe
- Options: model photography or styled/on-foot presentation
- Converts product images into an aspirational experienc
Lighting for Different Shoe Materials
Lighting must adapt to the material to accurately represent texture and finish.
Patent Leather (High Gloss)
- Reflective like a mirror
- Use large diffusion panels close to the subject
- Avoid harsh reflections from softboxes or umbrellas
- Goal: control reflections, not eliminate them
Full-Grain Leather
- Semi-reflective with visible grain
- Use soft, diffused lighting from angled positions (35–55°)
- Avoid flat lighting which removes texture
- Polish before shooting for a clean finish
Suede & Nubuck
- Matte and light-absorbing
- Use directional lighting to reveal nap texture
- Brush fibers consistently in one direction
- Avoid harsh light that creates unwanted shine
Canvas & Textile
- Very forgiving material
- Use soft, even lighting
- Angle light slightly to reveal weave texture
- Prep: remove wrinkles and lint before shooting
Mesh & Knit (Athletic Shoes)
- Semi-transparent material
- Use dark internal stuffing to prevent visibility through mesh
- Backlighting enhances texture and breathability
- Front lighting makes mesh appear more opaque
Translucent Soles
- Highly affected by background color
- Use backlighting or underlighting through a clear surface
- Goal: maintain clarity and avoid color contamination
Styling and Preparation
Proper preparation significantly improves image quality and consistency.
Shape Preservation
- Shoes lose form when empty
- Use:
- Tissue paper (basic stuffing)
- Shoe trees (structured footwear)
- Cardboard tubes (boots)
- Foam inserts (reusable, consistent shaping)
Lacing Techniques
- Clean, uniform lacing improves perceived quality
- Use consistent lacing across all products
- Techniques:
- Standard display lacing
- Wire-in-lace for controlled shaping
- Fishing line for floating lace effects
Consistency is more important than complexity.
Invisible Supports & Positioning
- Use fishing line for floating elements
- Gaff tape for holding parts in place
- Gloves to avoid fingerprints on glossy materials
- Microfiber cloth for final polishing
Cleaning and Finishing
- Clean shoes before shooting, especially soles
- Use appropriate cleaners (e.g., magic eraser for white soles)
- Remove dust, stains, and marks to reduce post-processing work
Key Takeaway
A professional shoe photography workflow combines:
- Consistent multi-angle coverage
- Material-specific lighting techniques
- Careful styling and preparation
Together, these elements create images that are visually appealing, accurate, and optimized for e-commerce performance.
How Cutout Partner Specializes in Shoe Photo Editing for Ecommerce Success
In the competitive world of ecommerce, high-quality visuals play a crucial role in attracting customers and driving conversions. Cutout Partner specializes in shoe photo editing by delivering clean, consistent, and marketplace-ready images tailored for platforms like Amazon, Shopify, eBay, and more.
Their approach focuses on ecommerce image editing, precision photo retouching, background removal, color correction, shadow creation, product photo editing and multi-angle consistency to ensure every product looks professional and visually appealing. By combining skilled human expertise with efficient workflows, Cutout Partner helps brands maintain uniformity across large catalogs while meeting strict ecommerce image standards.
This specialization allows footwear brands and retailers to present their products with clarity and consistency—ultimately enhancing customer trust, improving click-through rates, and boosting sales performance
Frequently Asked Questions
What is the best angle to photograph shoes for ecommerce?
The three-quarter view (45-degree angle, slightly elevated) is the most effective angle for shoe product photography. It captures the toe box, side profile, laces, and part of the sole in a single frame. Platforms like Amazon often require this as the main product image (single shoe, angled left at 45 degrees). For a complete listing, combine this with side profile, front, back, top-down, sole, detail, and lifestyle shots to achieve a full 7–8 image set.
How many product photos do I need for a shoe listing?
High-performing ecommerce listings typically include 7–8 images. At minimum, include:
- Side profile
- Three-quarter view
- Front view
- Back view
- Top-down view
- Sole view
To complete the set, add 1–2 detail close-ups or lifestyle images. On marketplaces like eBay and Poshmark, successful listings often include 8–16 images for better conversion.
How do you photograph shoes without reflections and glare?
For glossy materials such as patent leather, use large diffusion panels (2–3× the size of the shoe) placed close to the subject. This creates soft, controlled reflections instead of harsh highlights. Avoid bare softboxes, umbrellas, or direct flash. A polarizing filter can help reduce glare, but it should be used carefully to preserve the natural shine of the material. The goal is to control reflections, not eliminate them entirely.
What background should I use for shoe product photography?
A pure white background (RGB 255,255,255) is standard for most ecommerce platforms:
- Required for Amazon main images
- Preferred on eBay and StockX
- Automatically applied on platforms like Poshmark for cover images
For Shopify and brand websites, you can use colored or lifestyle backgrounds for secondary images to create a more branded visual experience.
Can AI generate product photos of shoes from a single image?
Yes. AI tools such as Nightjar can generate multiple angles (side, front, back, top-down, three-quarter), color variations using exact hex codes, and lifestyle visuals from a single high-quality product image. These systems infer 3D structure to maintain consistent lighting and perspective. A hybrid workflow—capturing one professional hero image and using AI to generate the remaining views and variants—is increasingly common.
How do you keep shoe photography consistent across a full catalog?
Maintaining consistency across large catalogs is challenging with traditional studio workflows due to variations in lighting, setup, and post-production across sessions. AI-based workflows help standardize outputs by applying consistent framing, lighting, and angles across all products. Platforms such as Cutout Partner streamline this process by ensuring uniform visual output across SKUs, eliminating inconsistencies that often occur in multi-session shoots.
How do you photograph different shoe materials like patent leather and suede?
Each material requires a tailored lighting approach:
- Patent leather: Use large diffusion panels to create soft, controlled reflections.
- Suede: Apply directional lighting and brush the surface to enhance texture.
- Full-grain leather: Use soft diffused light from angled positions (35–55°) to reveal grain.
- Canvas: Works well with even, soft lighting and minimal setup.
- Mesh: Backlighting helps emphasize texture and breathability.