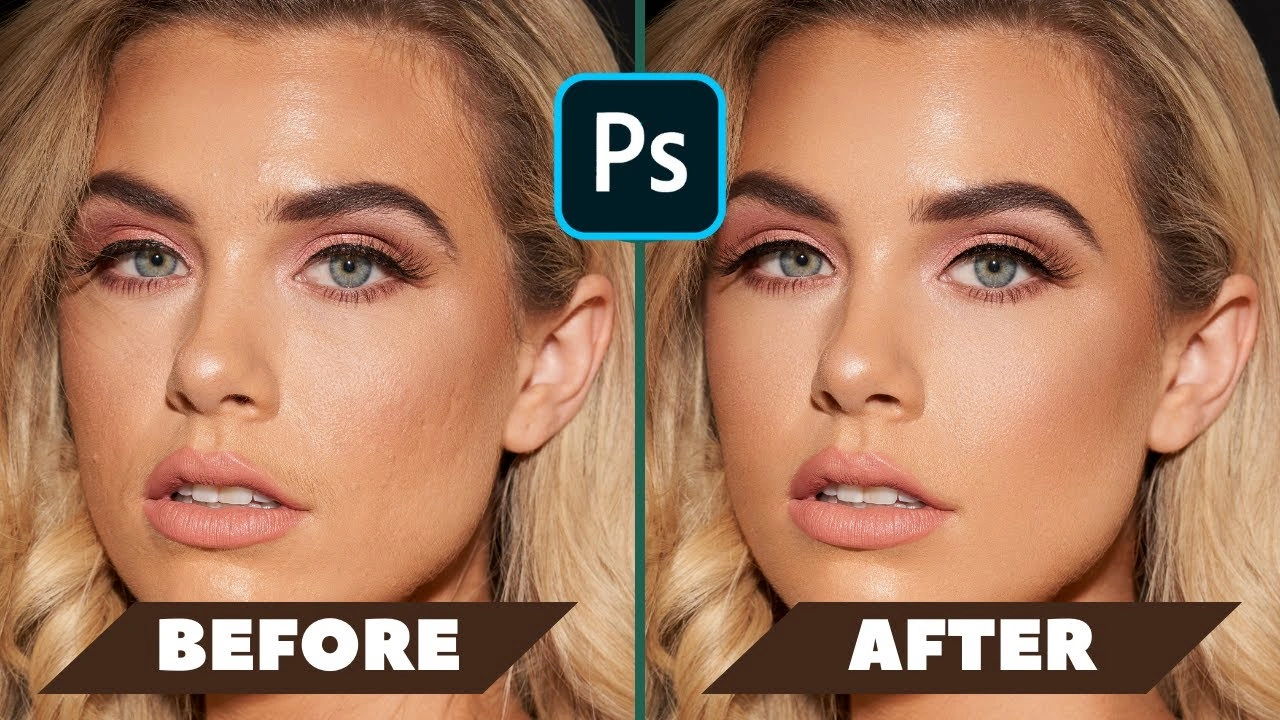
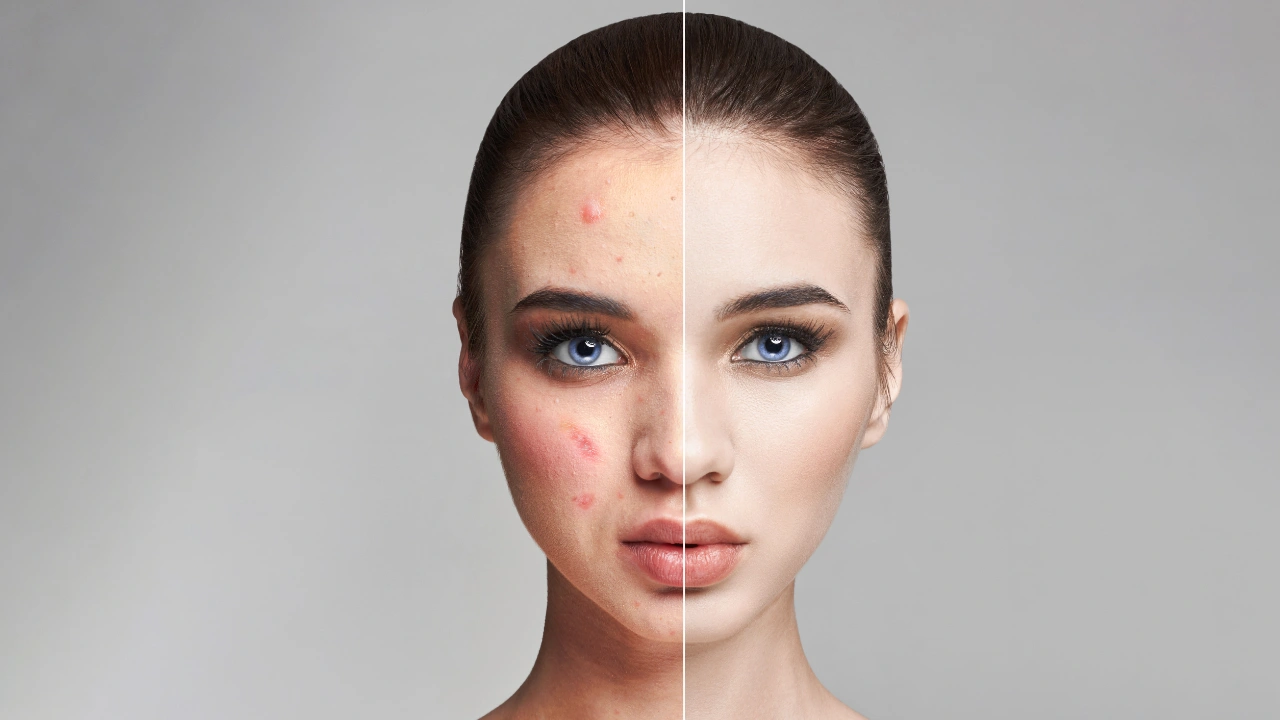
Perfecting an image isn’t just about capturing the right shot—it’s also about refining it. Retouching in Photoshop gives photographers, eCommerce brands, and creatives the ability to transform ordinary photos into polished, professional-quality visuals. Whether you’re a beginner or a seasoned designer, mastering photo retouching tips is one of the most valuable skills in digital image editing.
At Cutout Partner, our expert retouchers handle thousands of images daily, delivering high-end results that look natural, balanced, and visually captivating. In this complete guide, we’ll walk you through five practical Photoshop retouching tips and tricks that can take your editing skills to the next level.
By the end, you’ll understand how to control light, texture, and color in your photos—and you’ll never look at the retouching tools in Photoshop the same way again.
What Is Photo Retouching?

Photo retouching is the process of enhancing and refining images by correcting imperfections, adjusting tones, smoothing textures, and improving overall aesthetics. It’s the secret behind every flawless magazine cover, clean eCommerce product image, and stunning fashion portrait.
Retouching typically involves:
- Removing blemishes, dust, or unwanted marks
- Enhancing skin tones and textures
- Correcting color balance and lighting
- Sharpening image details
- Adjusting highlights, shadows, and exposure
- Improving composition and overall visual harmony
In short, retouching helps you turn a good image into a great one.
Why Retouching Matters

Whether you’re an eCommerce brand, fashion photographer, or digital artist, image quality directly impacts perception. Clean, well-balanced visuals communicate professionalism and trustworthiness—critical factors for conversion and engagement.
Benefits of Professional Retouching
- Enhanced Brand Image – High-quality images create a consistent and appealing visual identity.
- Better Conversion Rates – eCommerce studies show that visually refined product images boost sales significantly.
- Creative Flexibility – You can adjust colors, lighting, and mood without reshooting.
- Time Efficiency – With the right tools and workflow, editing becomes faster and more consistent.
- Visual Storytelling – Retouching helps express emotion, tone, and style in every photograph.
Getting Started with Retouching in Photoshop
Before diving into the specific tips, make sure you’ve set up your Photoshop workspace properly:
- Work with Non-Destructive Layers: Always duplicate your original image layer (Ctrl+J / Cmd+J) before editing.
- Use Adjustment Layers: Tools like Curves, Levels, and Hue/Saturation let you edit flexibly without altering the base image.
- Calibrate Your Monitor: Accurate color representation is crucial for professional results.
- Zoom In & Out Frequently: Check your edits at 100% zoom for precision and at 50% for natural viewing.
Now, let’s explore five powerful Photoshop retouching tips that every beginner should know.
Tip 1 of 5: Using Luminosity as a Selection | Photo Retouching Tips
Luminosity refers to the brightness levels of pixels in an image. By selecting based on luminosity, you can precisely adjust only the brighter or darker areas without affecting the entire photo.
How to Make a Luminosity Selection
- Open your image in Photoshop.
- Press Ctrl + Alt + 2 (Windows) or Command + Option + 2 (Mac).
- This shortcut loads a selection of the bright pixels (highlights).
- Alternatively, open the Channels Panel and Ctrl/Cmd + Click the RGB thumbnail to achieve the same effect.
Why It’s Useful
- Allows precise exposure and tone adjustments.
- Helps protect shadows and midtones while brightening highlights.
- Perfect for subtle skin retouching or light balancing in portraits.
Pro Tip from Cutout Partner
After making your luminosity selection, create a Curves or Levels Adjustment Layer. This ensures that your edits remain non-destructive and easy to fine-tune later.
Tip 2 of 5: Use the Spot Healing Brush Tool for Quick Cleanups
The Spot Healing Brush Tool is a beginner-friendly yet powerful Photoshop feature. It automatically samples nearby textures to clean up blemishes, wrinkles, and small imperfections.
How to Use It
- Select the Spot Healing Brush Tool from the toolbar or press J.
- In the top options bar, set the Type to Content-Aware.
- Adjust the brush size slightly larger than the blemish you’re removing.
- Click or lightly brush over the imperfection.
Photoshop will instantly replace the selected area with surrounding textures, maintaining natural skin tone and detail.
Best Practices
- Avoid overuse—it’s easy to make skin look too smooth or plastic-like.
- Use this tool for small spots, acne, or dust marks.
- For more control, switch to the Healing Brush Tool or Clone Stamp Tool on a separate layer.
Pro Tip from Cutout Partner
Always zoom in at 100% while retouching skin and zoom out frequently to check if the changes still look natural. Remember, the goal is to enhance, not erase authenticity.
Tip 3 of 5: Open the Same Image in Two Windows
When working on detailed retouching projects, it’s useful to see the full image and close-up details simultaneously. Photoshop lets you open two views of the same image so you can edit one zoomed in while monitoring overall changes in the other.
How to Do It
- Open your image.
- Go to Window → Arrange → New Window for [your file name].
- Then go to Window → Arrange → 2-up Vertical (or Horizontal).
Now you have two synchronized views of the same file. Edits on one will instantly appear on the other.
Why It’s Useful
- Work on micro-level retouching while maintaining overall composition.
- Prevents over-editing that looks unnatural from a distance.
- Ideal for portrait, fashion, and product retouching where detail precision matters.
Pro Tip
If you’re using dual monitors, drag one view to the second screen for a professional workflow setup—one for detail, one for overview.
Tip 4 of 5: Target Specific Sections Using Color Range
When you need to adjust only a certain color or tone—like skin, sky, or fabric—the Color Range command is incredibly powerful.
How to Use It
- Make a basic selection around your target area.
- Go to Select → Color Range.
- Use the Eyedropper Tool to click the color you want to select.
- Adjust Fuzziness to control selection tolerance.
- Click OK to confirm.
Now, only the selected color area will be active. You can apply changes to Hue, Saturation, or Brightness using adjustment layers.
- Applications
- Correcting uneven skin tones.
- Enhancing product colors in eCommerce images.
- Targeting skies, water, or clothing for specific color effects.
Pro Tip from Cutout Partner
After using Color Range, always feather your selection slightly (Select → Modify → Feather) to blend edges smoothly and avoid harsh transitions.
Tip 5 of 5: Experiment with Lab Color Mode
Most Photoshop users work in RGB (for digital) or CMYK (for print). However, Lab Color Mode is a hidden gem for advanced retouching and photo color correction.
Understanding Lab Color Mode
Lab mode separates the image into three channels:
- L (Lightness) – Controls brightness and contrast.
- A Channel – Represents green to magenta tones.
- B Channel – Represents blue to yellow tones.
Unlike RGB or CMYK, Lab mode allows you to adjust color and luminosity separately, resulting in more precise, vivid adjustments.
How to Use It
- Go to Image → Mode → Lab Color.
- Open the Channels Panel to access L, A, and B channels individually.
- Apply adjustments like Curves or Levels to specific channels.
- Switch back to RGB mode before saving the final image.
Benefits
- Enhances colors without introducing noise.
- Improves skin tones and contrast naturally.
- Retains full image detail and dynamic range.
Pro Tip from Cutout Partner
When working on product or jewelry photography, Lab color adjustments can make metallics shine and fabrics appear more vibrant—without oversaturation.
Bonus: Professional Photo Retouching Tips Workflow Checklist
To make your retouching process more efficient and consistent, follow this proven workflow used by professional editors at Cutout Partner:
- Duplicate the Background Layer – Always preserve the original.
- Clean Up – Use Spot Healing and Clone Stamp tools.
- Dodge & Burn – Subtly enhance highlights and shadows.
- Frequency Separation – Balance texture and tone separately for flawless skin.
- Color Correction – Adjust tones using Hue/Saturation or Curves.
- Sharpening – Apply selective sharpening for clarity.
- Final Review – Zoom in and out, ensuring the image looks natural at all scales.
- Common Retouching Mistakes (and How to Avoid Them)
Even experienced editors make mistakes. Here are some to avoid:
- Over-smoothing Skin: It removes natural texture and makes faces look artificial.
- Ignoring Color Balance: Always check white balance to maintain realism.
- Using Too Much Contrast: Harsh edits can destroy image details.
- Flattening Too Early: Keep your layers separate for flexibility.
- Forgetting Context: An image should still match the brand’s tone, background, and style.
Tools Every Retoucher Should Master | Photo Retouching Tips
To achieve flawless results, here are the top Photoshop tools professionals rely on daily:
- Healing Brush & Spot Healing Brush – For blemish correction.
- Clone Stamp Tool – For duplicating or repairing textures.
- Dodge & Burn Tools – To sculpt light and depth.
- Curves & Levels – For tonal correction.
- Selective Color & Hue/Saturation – For fine-tuning colors.
- Gaussian Blur & High Pass Filter – For skin softening and sharpening.
Each of these tools, when used carefully, can make your images look clean, balanced, and professional.
You might also read this article:
- A Complete Guide to Clipping Path Tips for Beginners
- Masking vs Clipping Path: Which Technique Is Best for Image Editing?
Why Choose Cutout Partner for Professional Retouching Services
While it’s great to learn retouching on your own, professional-grade results often require experience, precision, and attention to detail. At Cutout Partner, our team of 50+Photoshop experts delivers premium photo retouching services trusted by eCommerce, fashion, jewelry, and photography brands worldwide.
Why Clients Trust Us
- High-End Quality: Every image is hand-retouched with care—no AI over-processing.
- Fast Turnaround: Quick delivery without sacrificing quality.
- Affordable Pricing: Get premium edits at competitive rates.
- Data Security: We maintain strict confidentiality and file safety.
- Global Reach: Serving 3,000+ satisfied clients across 50+ Expert Designer.
From portrait retouching to product image enhancement, we ensure your visuals look flawless and consistent across all platforms.
Final Thoughts
Mastering photo retouching is an exciting journey. It’s where art meets technique—and every small adjustment can dramatically transform an image’s impact. With the tips above—using luminosity selections, spot healing, color targeting, dual windows, and Lab color mode—you’ll be equipped to retouch with confidence and creativity.
Whether you’re editing portraits, fashion photos, or product images, remember that subtlety is key. The goal is to enhance natural beauty, not replace it.
And if you ever need professional support, Cutout Partner is here to bring your photos to perfection. Our image editing expertise ensures that every image you showcase reflects quality, consistency, and care—because flawless images speak louder than word.