In product photography, capturing the perfect shot involves more than just sharp focus and vibrant colors. One of the most subtle yet powerful tools in a photographer’s arsenal is shadow creation shop product photography. Shadows not only anchor your product in space but also enhance depth, realism, and visual appeal. Without carefully crafted shadows, even a beautifully lit product can appear flat, artificial, or less compelling to online shoppers.
For e-commerce brands, photography studios, and professional photo editors, understanding how to create and manipulate shadows is essential. In this guide, we’ll explore the nuances of shadow creation, share practical techniques for both shooting and editing, and highlight how professional editing services like Cutout Partner product editing can elevate your images.
Why Shadows Matter in Product Photography

Shadows are often underestimated in product photography. Yet, they play a critical role in shaping how viewers perceive your products. Properly placed shadows can:
- Add depth and dimension: Shadows give your product a sense of weight and presence, making it feel tangible and real.
- Highlight texture and contours: A well-placed shadow can emphasize curves, edges, and surface textures, making details stand out.
- Guide viewer attention: Shadows can subtly direct focus to your product’s most important features.
- Create mood and style: Shadows influence the overall tone of your image, from soft and elegant to dramatic and high-contrast.
When done right, shadows make your products visually engaging, helping customers imagine them in real-life settings—a crucial factor for e-commerce conversions.
Types of Shadows in Product Photography
Understanding different shadow types is the first step toward mastering them. Here are the most common shadows used in professional product photography:
1. Cast Shadows
These are the shadows a product projects onto a surface or background. They indicate the direction and intensity of light and are essential for creating a sense of realism.
Example: A coffee mug casting a soft shadow on a table surface.
2. Form Shadows
Form shadows appear on the object itself, typically on areas facing away from the light source. They reveal the product’s shape and texture.
Example: The curve of a sneaker creating a subtle shadow on its inner side.
3. Reflected Shadows
These shadows occur when light bounces off surrounding surfaces and subtly affects the product. Reflected shadows are important for products placed on reflective or glossy surfaces.
Example: A jewelry piece reflecting a faint shadow on a polished table.
4. Soft vs. Hard Shadows
- Soft shadows are diffused and gentle, often created with softboxes or diffusers. They produce a natural, pleasing look.
- Hard shadows are crisp and well-defined, typically from direct lighting. They can add drama and contrast but may look unnatural if overused.
Understanding these shadow types allows photographers and editors to choose the right style for their product and audience.
Tools and Techniques for Creating Shadows During Shooting
While post-production editing can refine expert shadow creation in photoshop, capturing them correctly during the shoot lays the foundation for realism. Here’s how to do it:
1. Lighting Control
- Use softboxes or diffusers for soft, natural shadows.
- Position a key light at an angle to produce depth.Set featured image
- Add a fill light to reduce harsh shadows where necessary.
2. Reflectors and Flags
- Reflectors bounce light back onto the product, filling in shadows selectively.
- Flags or black cards block light to deepen shadows for more contrast.
3. Background and Surface Selection
- Matte surfaces prevent unwanted reflections and help maintain clean shadow edges.
- Transparent or glossy surfaces can produce unique reflected shadows if used intentionally.
4. Camera Angle and Composition
- Shooting slightly above or at product level can enhance the natural shadow fall.
- Experimenting with angles ensures shadows enhance rather than distract from the product.
By paying attention to these elements, photographers can create shadows that feel natural and flattering, minimizing heavy post-production work.
Post-Production and Product Shadow Creation and Enhancement
Even with perfect lighting, some products benefit from shadow enhancement in post-production. This is where professional editing services like Cutout Partner product editing can make a difference.
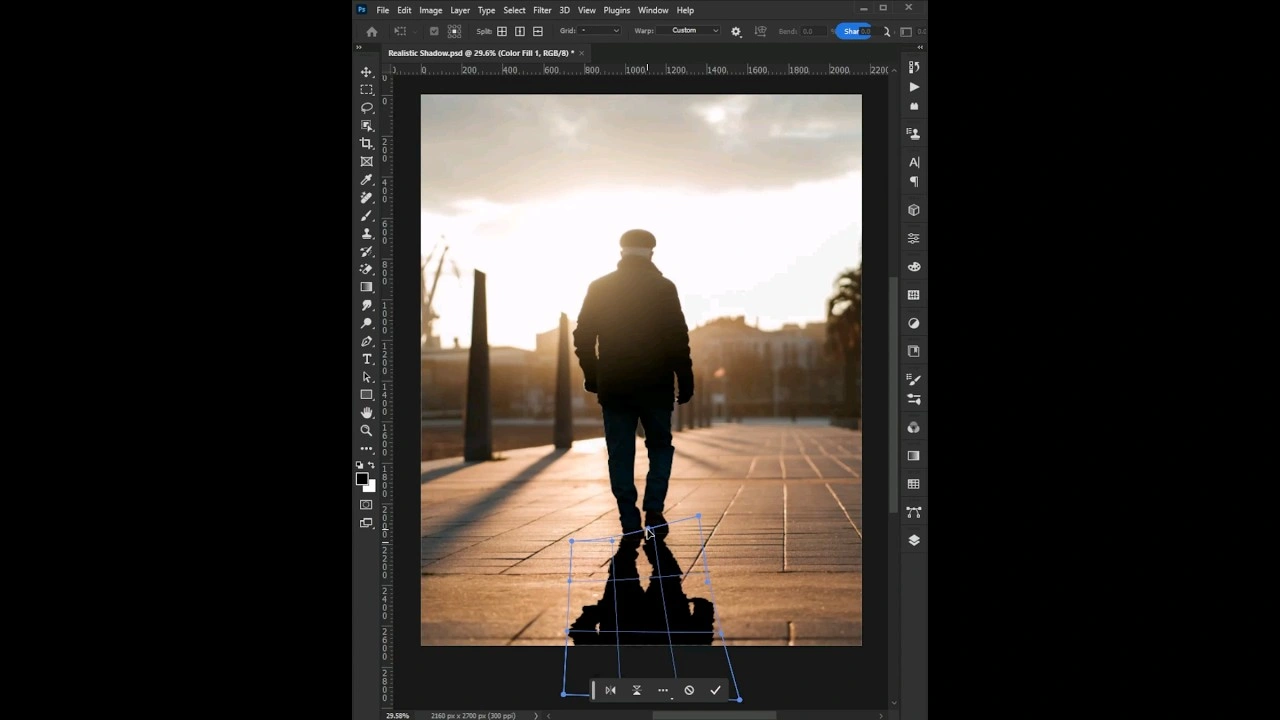
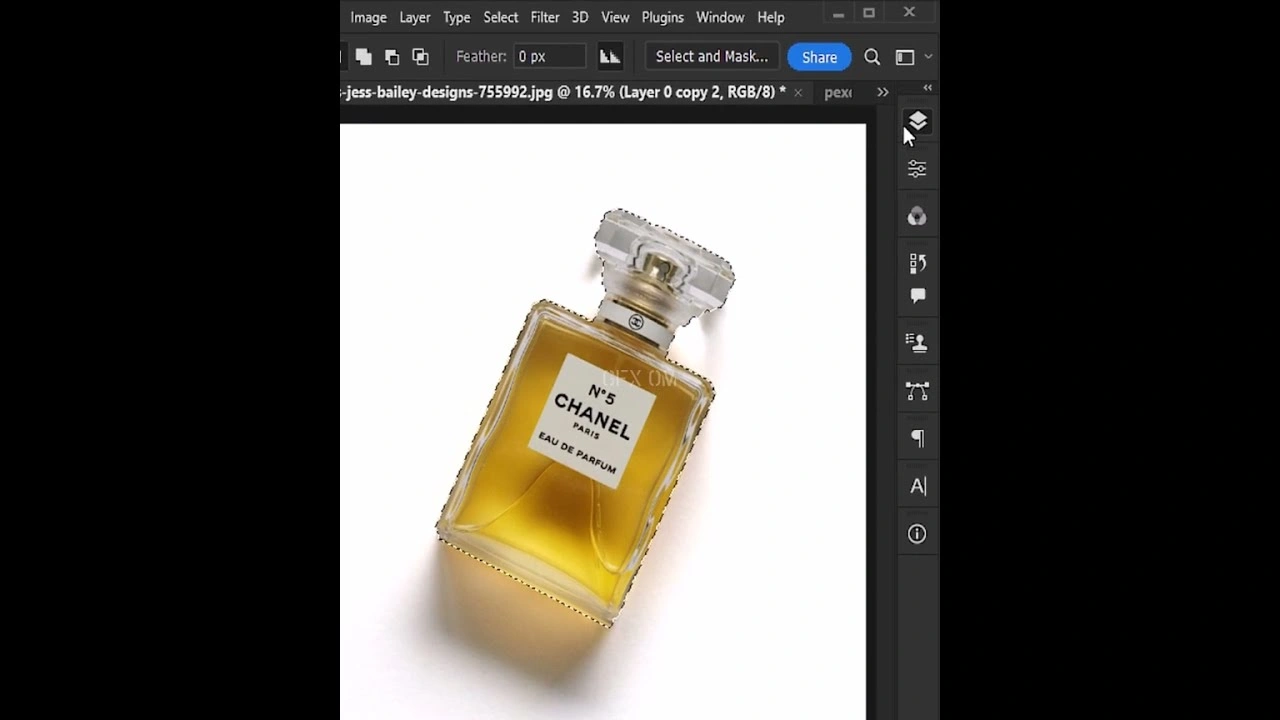
1. Manual Shadow Painting
- Use Photoshop or similar software to manually create shadows with brush tools.
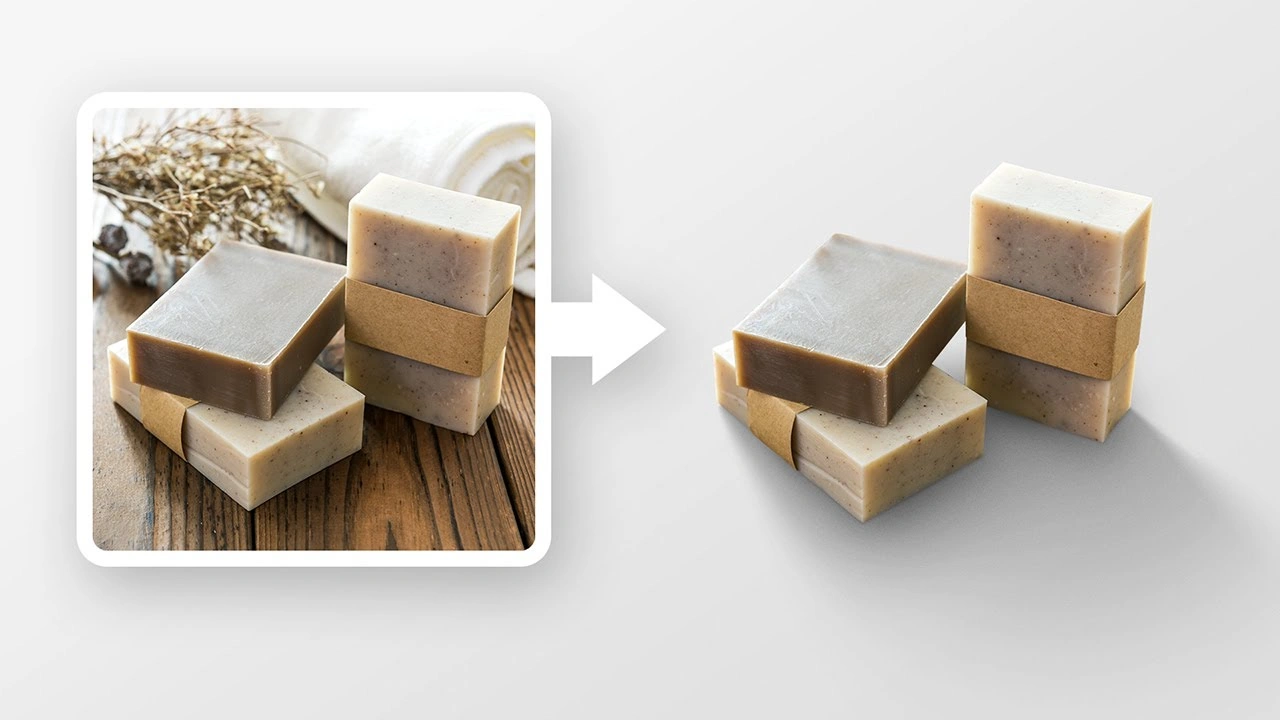
- Ideal for products shot on white backgrounds where shadows need to be added from scratch.
2. Layered Shadows
- Combine multiple shadow layers for complex products.
- Allows control over softness, opacity, and direction.
3. Blurring and Feathering
- Feather edges of shadows to prevent harsh or unnatural lines.
- Gaussian blur can mimic soft shadows for realistic depth.
4. Shadow Matching
- Match shadow tone and intensity to the lighting in the original image.
- Avoid shadows that look too dark or disconnected, as this can make the product appear edited or fake.
5. Reflection and Ground Shadows
- Subtle reflections can complement shadows on glossy surfaces.
- Ground shadows provide the product with a sense of placement, anchoring it to a surface.
These techniques are essential for e-commerce imagery, where clean, realistic shadows enhance the perceived quality of the product.
Best Practices for Realistic Shadows
To achieve professional-looking shadows consistently, follow these practical guidelines:
- Observe Real-Life Light: Study how objects cast shadows in natural light. Replicating this in your photography enhances realism.
- Consistency is Key: Keep shadow direction and intensity consistent across product shots in a catalog.
- Adjust Opacity: Shadows should not overpower the product. Subtlety is often more effective.
- Mind the Background: Avoid shadows that blend awkwardly or create distracting shapes.
- Test Multiple Angles: Shadows can change dramatically with camera angle. Shoot multiple options for flexibility in editing.
Resource Content:
Common Mistakes to Avoid in Shadow Creation
Even experienced photographers can fall into shadow-related pitfalls. Watch out for these:
- Overly harsh shadows: Can make products appear unnatural or uninviting.
- Disconnected shadows: Shadows that don’t align with the light source break realism.
- Ignoring background influence: Shadows can interact with reflections or textures; failing to consider this leads to inconsistent visuals.
- Excessive post-production manipulation: Heavy shadow adjustments can result in halos or ghosting around the product.
Being aware of these errors saves time and ensures a polished final image.
How Cutout Partner Enhances Product Shadows
Professional photo editing agencies like Cutout Partner specialize in refining shadows to make products stand out. Their expertise includes:
- Custom shadow creation for white or transparent backgrounds
- Shadow enhancement to improve depth and realism
- Consistent catalog shadowing for e-commerce brands
- High-quality product image retouching including reflection management and edge refinement
By combining meticulous editing with industry-standard tools, Cutout Partner helps photographers, studios, and online retailers produce images that look natural, professional, and commercially effective.
Examples and Case Studies
Consider these typical scenarios where shadow editing transforms product images:
Case Study 1: Kitchenware E-commerce Brand
- Problem: Flat, floating look in product shots on white backgrounds.
- Solution: Cutout Partner applied soft cast shadows aligned with the product lighting.
- Result: Products appeared grounded, realistic, and visually appealing, increasing click-through and sales potential.
Case Study 2: Jewelry Photography
- Problem: Reflections and shadows on shiny surfaces caused distractions.
- Solution: Professional product photo editing selectively added subtle shadows and minimized harsh reflections.
- Result: Jewelry pieces looked luxurious, enhancing customer perception and conversion.
These examples highlight how proper shadow creation—both in-camera and post-production—elevates product imagery.
You might also read this article
- Best & Affordable Clipping Path Service Provider
- How to Choose the Best Photo Retouching Company
- Photoshop Services Near Me: Why Choose Cutout Partner
- Cutout Partner: Expert Photo Editing Services for eCommerce
Conclusion
Mastering shadow creation in product photography is essential for creating visually compelling, realistic product images. Shadows influence depth, highlight details, and guide viewer focus, all of which are critical in the highly competitive world of e-commerce.
For photographers, studio owners, and professional editors, combining precise lighting techniques during shooting with expert post-production adjustments ensures that products “pop” in every image. Leveraging services like Cutout Partner product editing provides the edge needed to deliver polished, commercial-grade images that enhance brand appeal and boost sales.
Ultimately, shadows are more than just dark shapes—they are a powerful storytelling tool that transforms ordinary product photos into captivating visual experiences.
FAQ on Mastering Shadow Creation in Product Photography
What is the importance of shadows in product photography?
Shadows add depth, dimension, and realism to product images. They help define the product’s shape, highlight textures, and make the image visually appealing to viewers. Properly created shadows guide the eye and make products look more professional, boosting engagement and potential sales.
How can I create natural shadows in product photography?
Natural shadows can be created by controlling light direction and intensity. Use softboxes, diffusers, or reflectors to shape shadows gently, avoiding harsh lines. Positioning the product at an angle relative to the light source ensures a balanced and realistic shadow effect that enhances the product’s features.
Should I create shadows in-camera or in post-production?
Both approaches work, but in-camera shadows often look more natural. Lighting setup and reflector placement allow precise control over shadow softness and direction. Post-production editing, such as with Lightroom or Photoshop, can enhance or refine shadows without compromising realism. Combining both methods produces the best professional results.
What are the common types of shadows in product photography?
The most common types include soft shadows, hard shadows, drop shadows, and reflected shadows. Soft shadows create a subtle, diffused look; hard shadows are sharp and dramatic; drop shadows lift the product visually; reflected shadows mimic the surface interaction. Choosing the right type depends on product style and brand aesthetics.
How can I enhance shadows in post-production?
Shadows can be enhanced using photo editing tools like Photoshop or Lightroom. Adjustment layers, gradient masks, and opacity control allow you to darken or soften shadows selectively. Dodging and burning can also refine shadow edges for a natural, three-dimensional appearance.
What mistakes should I avoid when creating shadows for products?
Avoid overly harsh or inconsistent shadows, unnatural angles, and excessive opacity that distracts from the product. Shadows that are too dark or mismatched to the lighting direction can make images look unrealistic. Maintaining consistency across a product gallery is key to professional results.
Can shadows increase product sales in e-commerce photography?
Yes, realistic shadows make products appear tangible and professional, which improves viewer perception and trust. Shadows add depth and context, helping customers visualize the product in real life. High-quality product images with proper shadows can significantly enhance click-through and conversion rates.
How does Cutout Partner help with shadow creation in product photography?
Cutout Partner is a premium image editing agency serving clients in the USA and worldwide. Their editors specialize in creating natural, professional shadows that enhance product realism. By combining technical expertise with aesthetic precision, they help brands make products pop and maintain consistent, high-quality e-commerce imagery.
What tools are best for editing shadows in product images?
Professional photo editors use Adobe Photoshop, Lightroom, or similar software to refine shadows. Tools like the Brush Tool, Gradient Masks, and Dodge & Burn allow precise control. Lightroom can adjust overall shadow intensity and softness, while Photoshop offers detailed, layer-based editing for perfect results.
How long does it take to create shadows in product photography?
Shadow creation time depends on the method and complexity of the product. In-camera setups can take a few minutes per shot with proper lighting, while post-production refinement can take 5–15 minutes per image depending on detail. Outsourcing to professional agencies like Cutout Partner can save significant time without compromising quality.