Headshot retouching is one of the most in-demand services in photography and the modeling industry. Just like capturing a great headshot, retouching plays a key role in keeping the image natural while enhancing its overall quality for final use.
A headshot is usually a close-up photo that focuses on a person’s face and shoulders. It is widely used for personal branding, business profiles, marketing, and building a strong professional identity.
Working with a professional retouching agency like Cutout Partner can greatly improve how your image or brand is presented. Whether you need a corporate profile picture or a polished modeling portfolio, expert retouching makes a noticeable difference.
The goal of headshot retouching is to create a clean, natural, and professional look that highlights the subject’s best features without over-editing. It helps make the image more appealing and trustworthy to potential clients.
In this article, we’ll share simple and effective headshot retouching tips and techniques to turn ordinary photos into eye-catching, professional images.
What is Headshot Retouching?
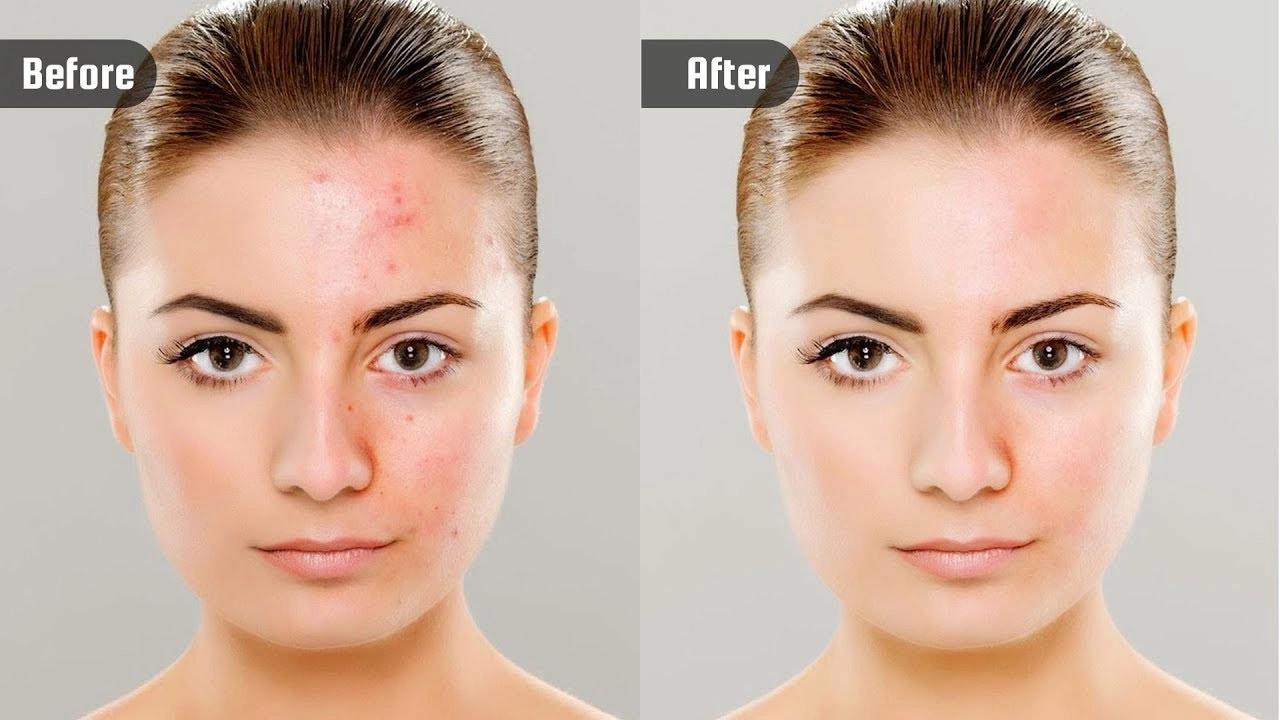
Headshot retouching is the process of enhancing and refining a portrait photo, with a clear focus on the face, head, and shoulders. The goal is to improve the overall appearance while keeping the subject looking natural and professional. It helps create a clean and polished image suitable for business profiles, portfolios, and personal branding.
Key Points for Professional Headshot Retouching
Lighting Adjustments
- Exposure: Adjust brightness to fix uneven lighting and create a balanced look.
- White Balance: Correct color tones so the image appears natural and true to life.
Skin Retouching
- Smoothing: Lightly smooth the skin while preserving natural texture.
- Blemish Removal: Remove temporary spots or marks without over-editing.
Eye Enhancement
- Brightness: Slightly brighten the eyes to make them look fresh and lively.
- Iris Color: Enhance the natural eye color for a subtle, attractive effect.
Facial Features
- Structure: Make small adjustments to features like the jawline or cheekbones for balance.
- Expression: Soften harsh lines while maintaining the person’s natural expression.
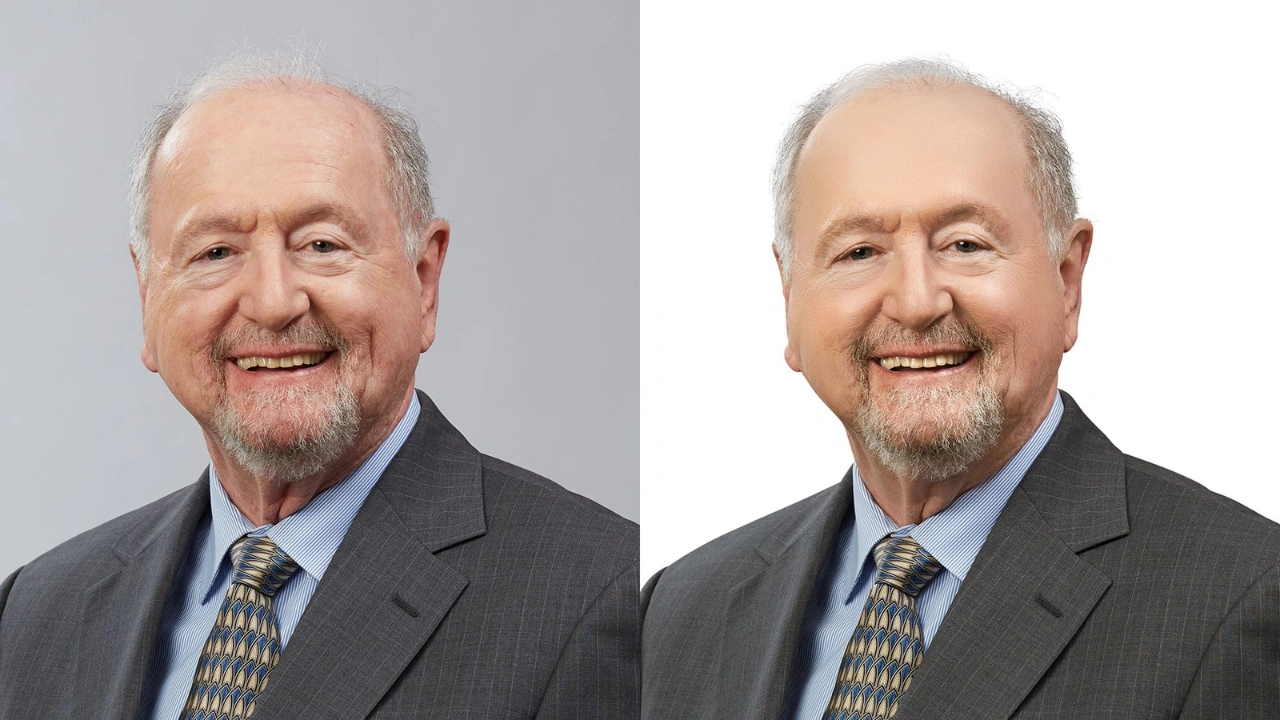
Background Adjustment (Optional)
- Clean-Up: Remove unwanted distractions from the background.
- Blur: Apply a soft blur to keep focus on the subject.
Color Correction
- Tone: Adjust overall color tones for consistency.
- Saturation: Fine-tune colors to match the desired style and mood.
Professional headshot retouching is all about subtle improvements that enhance your image without making it look artificial. With expert services like Cutout Partner, you can achieve high-quality, natural-looking results that reflect your brand and professionalism.
Headshot Retouching vs Portrait Retouching
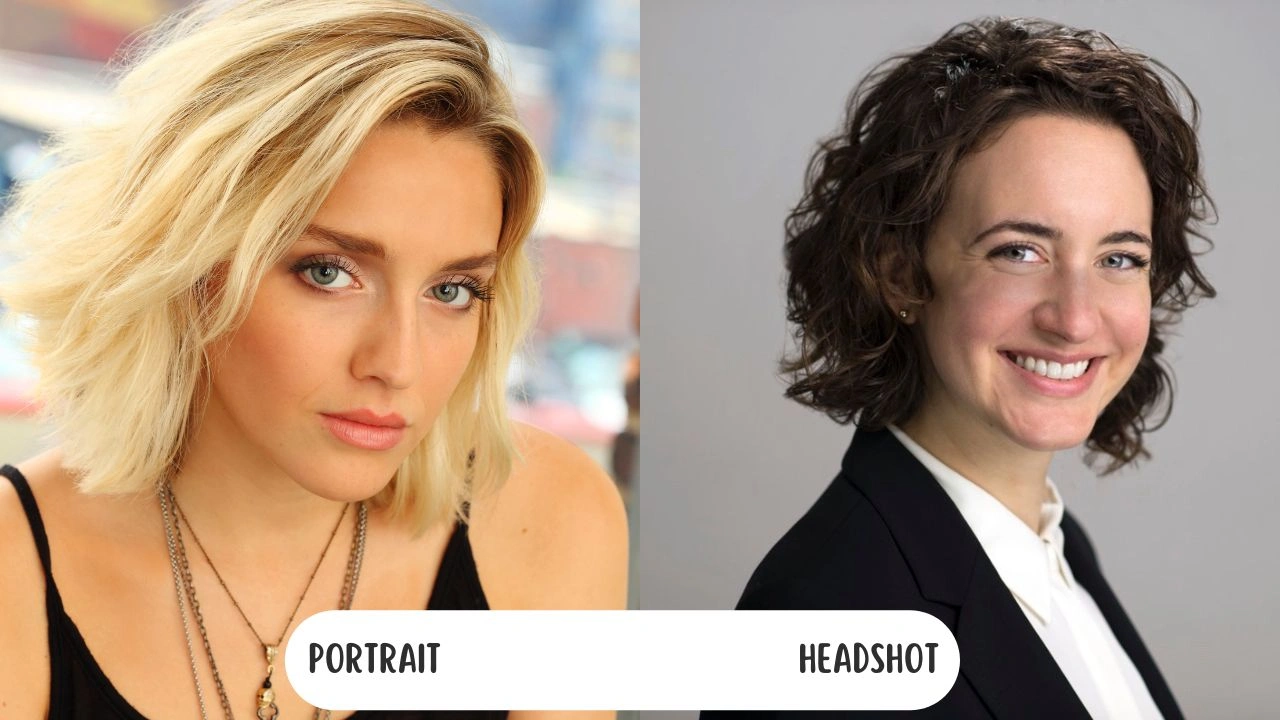
Headshot and portrait retouching are often confused, but they serve different purposes and follow different approaches. Understanding these differences helps you choose the right style for your needs.
Focus
A headshot is actually a type of portrait, but not all portraits are headshots.
Headshot retouching focuses mainly on the face, head, and shoulders, where the subject fills most of the frame and the background is minimal or blurred. The main goal is to refine facial details and create a clean, professional look.
Portrait retouching, however, covers a wider range. It can include close-up shots, half-body, or full-body images, often with important backgrounds or environments. It focuses not only on the face but also on overall skin tone, texture, and the entire composition.
Purpose
Headshot retouching is mainly used for professional reasons such as corporate profiles, business branding, or modeling portfolios. The editing is kept minimal to maintain a natural and authentic appearance.
Portrait retouching is more creative and flexible. It is used to express mood, style, or artistic vision. The goal can vary from enhancing beauty to telling a visual story, depending on the project.
Retouching Style
Headshot retouching follows a subtle and realistic approach. It removes small imperfections while keeping the person’s natural look unchanged.
Portrait retouching, on the other hand, allows more creativity. Editors may use stronger techniques like advanced skin smoothing, color grading, and lighting effects to achieve a specific artistic result.
In short, headshot retouching is clean, natural, and professional, while portrait retouching is broader, more flexible, and often more creative. Choosing the right one depends on your purpose and the message you want to convey.
Do’s and Don’ts of Headshot Retouching
Headshot retouching can greatly improve your professional image, but the key is to keep everything balanced and natural.
Do’s
- Keep it subtle: Focus on natural-looking edits. Remove major blemishes or marks, but keep skin texture and pores visible.
- Match skin texture: When removing spots or imperfections, use similar skin texture so the edits blend seamlessly. Always use non-destructive editing techniques.
- Enhance, don’t change: Lightly improve features like eyes (brighten, reduce redness) and teeth (whiten), but keep their original shape and size.
- Use natural lighting: Soft, natural light makes headshots look more flattering and easier to retouch realistically.
- Maintain consistency: If you’re using headshots for branding, keep the same background, lighting, and editing style across all images for a professional look.
Don’ts
- Avoid over-smoothing: Don’t remove all skin texture. Too much airbrushing makes the image look fake.
- Don’t reshape excessively: Avoid changing face shape, eyes, or features too much. The goal is enhancement, not transformation.
- Don’t over-edit small areas: Zooming in too much can lead to over-editing. Step back often to keep the image balanced.
- Skip heavy filters: Strong presets or filters can ruin the natural and professional appearance.
- Avoid inconsistency: Using different editing styles for multiple headshots can harm your personal or brand identity.
10 Tips for Professional Corporate Headshot Retouching

Creating a high-quality headshot starts with the right techniques and tools. Here are some simple and effective tips to help you achieve natural and professional results.
1. Shoot in RAW Format
Shooting in RAW format gives you maximum control during editing. It keeps all the image data without compression, allowing you to adjust exposure, white balance, and colors without losing quality. It also helps recover details from shadows and highlights for better retouching results.
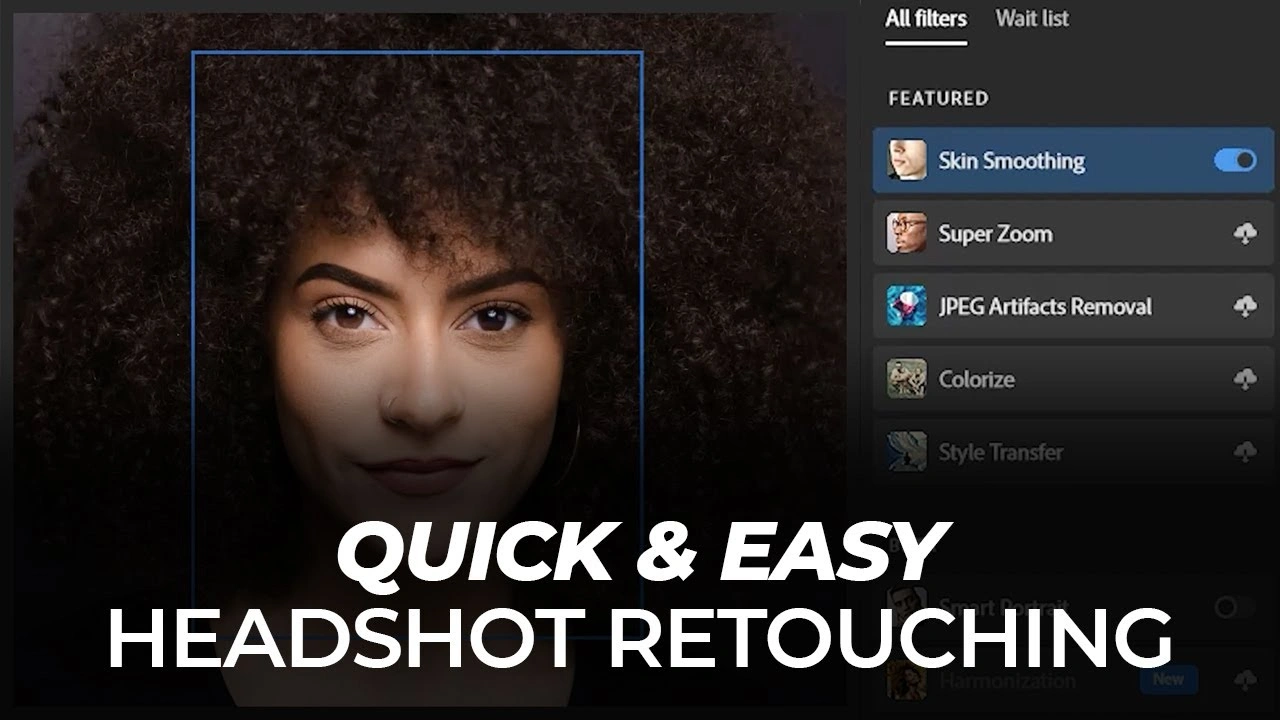
2. Choose the Right Software
Using the right editing software makes a big difference in your workflow and final output. Here are some popular options:
- Adobe Photoshop: A powerful tool with advanced retouching features, including modern AI tools for faster editing.
- Adobe Lightroom: Beginner-friendly and great for color correction and overall adjustments.
- GIMP: A free option with strong editing and retouching capabilities.
- Affinity Photo: Known for speed and precision with a one-time purchase option.
- Capture One: Excellent for RAW processing and handling large image files.
- Luminar AI: AI-powered software that simplifies editing with quick and smart adjustments.
Choose the one that fits your skill level, budget, and editing needs.
3. Focus on Natural Skin Retouching (Quick and Easy)
Always keep skin texture realistic. Avoid over-smoothing and only remove temporary blemishes while preserving natural details.
4. Enhance Eyes Carefully
Brighten the eyes slightly and reduce redness, but avoid making them look unnatural or overly sharp.
5. Use Non-Destructive Editing
Always edit your images using layers and masks instead of making direct changes to the original photo. This allows you to easily adjust, refine, or undo edits at any stage without losing image quality or important details.
6. Adjust Lighting and Colors
Fix exposure, contrast, and white balance to create a balanced and natural look. Good color correction improves the overall quality of the image.
7. Keep Background Clean and Simple
Remove distractions and use a soft blur if needed. A clean background helps the subject stand out clearly.
8. Maintain Consistency
If you are editing multiple headshots, keep the same style, tone, and lighting across all images. This is especially important for professional branding.
9. Clean Up the Background
Remove any distracting elements from the background to keep the focus on the subject. You can also apply a soft blur to create depth and make the person stand out more clearly.
10. Avoid Over-Editing
Keep your edits minimal and natural. The goal of headshot retouching is to enhance the subject’s appearance, not to completely change how they look.
Top Reasons to Choose Cutout Partner for Professional Headshot Retouching
In today’s competitive digital world, professional headshots play a crucial role in personal branding, corporate identity, and online presence. A well-retouched headshot creates a strong first impression and communicates professionalism and trust. Choosing the right photo retouching services is essential to achieve high-quality results. Cutout Partner stands out as a reliable partner for delivering consistent and natural-looking headshot retouching services worldwide.
Professional Expertise and Skilled Team
One of the main reasons to choose Cutout Partner is its team of over 50 skilled Photoshop experts. These professionals are experienced in handling different types of image editing tasks, including headshot retouching, ensuring every image is refined with precision and care. Their expertise allows them to maintain a perfect balance between enhancement and natural appearance.
High-Quality and Consistent Results
Consistency is key when it comes to professional headshots, especially for corporate teams and branding purposes. Cutout Partner ensures uniform quality across all images by following standardized editing workflows. This helps maintain a cohesive visual identity, whether for individuals or large organizations.
Wide Range of Image Editing Services
Beyond headshot retouching, Cutout Partner offers a variety of services such as clipping path, background removal, invisible ghost mannequin, and image manipulation. This makes it a one-stop solution for businesses across industries like eCommerce, fashion, and photography. Clients can rely on a single provider for multiple editing needs.
Fast Turnaround Time
Timely delivery is essential in today’s fast-paced business environment. Cutout Partner is known for its quick turnaround times without compromising on quality. Whether it’s bulk headshot editing or urgent projects, the team ensures deadlines are met efficiently.
Cost-Effective Solutions
Outsourcing image editing to Cutout Partner helps businesses save time and reduce operational costs. Their services are competitively priced, making professional-grade retouching accessible for both small businesses and large enterprises.
Trusted by Global Clients
With over 3,000 satisfied clients worldwide, Cutout Partner has built a strong reputation for reliability and quality. Their global client base reflects their commitment to delivering excellent service and maintaining long-term professional relationships.
Start With the Basics
Before moving into advanced retouching techniques, it’s important to begin with the fundamentals. Focus on correcting exposure, color balance, and sharpness to create a well-balanced image.
Professional tools like Adobe Photoshop or Lightroom can help make these adjustments efficiently. A properly exposed and color-balanced headshot provides a strong foundation for further editing and ensures better overall results.
Smoothing Out Clothing Wrinkles
Wrinkles in clothing can distract from a professional headshot. These imperfections can be corrected using tools such as the clone stamp or healing brush.
The clone stamp allows you to copy a smooth area of fabric and blend it over wrinkles, while the healing brush matches textures automatically to create a natural finish. Fixing these small details helps maintain a clean and polished appearance.
Adjust Exposure & Contrast
Fine-tuning exposure and contrast is essential in headshot retouching. Exposure controls the brightness of the image, while contrast defines the difference between light and dark areas.
Adjusting these settings helps correct underexposed or overexposed images. Subtle improvements can enhance facial features, add depth, and improve clarity without making the image look unnatural.
Listen to What the Client Wants
Understanding the client’s expectations is key to delivering satisfying results. Headshots are not only professional images but also personal representations, so the subject should feel confident in the final outcome.
Clear communication at the beginning helps reduce revisions and ensures the retouching matches the client’s vision, saving time and improving workflow efficiency.
Deliver Images in the Right Format
Once retouching is complete, deliver the images in appropriate formats. Providing both high-resolution files and web-optimized versions is a good practice.
High-resolution images are ideal for print, while compressed versions load faster for online use. This approach ensures convenience for the client and avoids additional resizing requests.
Final Words
Headshot retouching is a skill that improves with patience, consistent practice, and a careful eye for detail. The key to achieving professional results is to enhance the image while preserving its natural look. By following proper techniques such as balanced exposure adjustments, subtle skin retouching, accurate color correction, and careful background cleanup, you can create headshots that appear clean, polished, and authentic. Avoid over-editing and always aim for a realistic finish that reflects the subject’s true appearance.
For those who want to achieve high-quality results without spending excessive time on editing, working with a professional retouching agency like Cutout Partner is a smart choice. Their expertise ensures every headshot is refined with precision, consistency, and a natural touch, helping individuals and businesses create a strong and lasting impression.